Quick Links
Key Takeaways
- Echo Show models with Visual ID provide personalized information on the touchscreen based on who is standing in front of it, making it easy to see what’s important to you.
- Visual ID is stored directly on the Echo Show and not sent to Amazon’s cloud servers, ensuring privacy and data security.
- You can create a Visual ID by enrolling during the Echo Show setup, saying “Alexa, learn my face,” or going to Settings > Your Profile & Family > Visual ID. Up to 10 household members can enroll on a single device.
Amazon Echo Show devices can show you information about your day, like a calendar or the weather. If there are multiple people in your household, you can set up Visual ID to make it automatically show information tailored to you. Here’s how to do it.
What Is Visual ID and How Secure Is It?
There are many ways to customize the Amazon Echo experience, like getting your own Alexa News Flash Briefings. But Visual ID is a bit different in that the Echo Show will customize what’s shown on screen depending on who is standing in front of it. It does this by using the built-in camera to recognize who is using it.
For example, when you’re standing in front of a compatible Echo Show, it will show your daily schedule and other personalized recommendations. When someone else in your home has enabled Visual ID, it will also show them custom information when they stand in front of it.
Any Visual ID information is stored directly on the Echo Show, to protect your privacy. Nothing is sent to Amazon’s cloud servers. Amazon also states that it doesn’t have any access to the data.
If you have any children who might want to use the Visual ID feature, it will be linked to their Amazon Kids profile. That also means that when a child is recognized, the Echo Show will only provide age-appropriate content on the screen.
Visual ID is available on the second- and third-generation Echo Show 8, third-generation Echo Show 10, and the Echo Show 15.
How to Set Up Visual ID
There are three ways to set up Visual ID for yourself. Every person who wants to use this feature will need to enroll. Since the images aren’t stored in the cloud, you’ll also have to enroll for each Echo Show if you have more than one in your home.
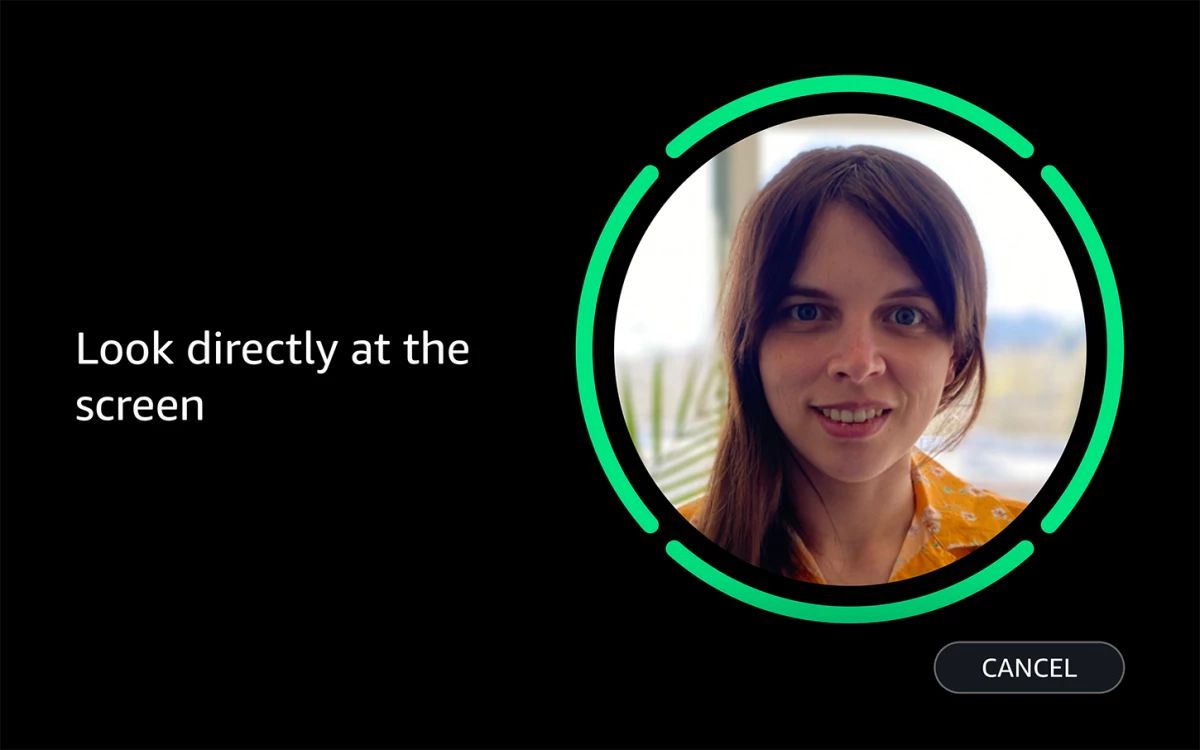
When setting up a new compatible Echo Show, you can enroll Visual ID during that process.
Alternatively, you can just say “Alexa, learn my face,” to start the process at anytime.
Or you can head to the Echo Show’s touchscreen and choose Settings. Select “Your Profile & Family” and then pick “Enable Visual ID.”
During the enrollment process, the Echo Show will take a series of headshots at five different angles. Make sure to turn as many lights on as possible, as each image needs to be high quality.
You’ll know Visual ID is working when your avatar and personalized greeting appear in the upper right corner of the screen.
Up to 10 members of a household can enroll with Visual ID on a single device.
How to Delete Visual ID
If you ever want to delete Visual ID for yourself, there are two ways to do that. In the Alexa app, open Settings. Then head to “Your Profile” and choose “Visual ID.” Finally, choose “Delete Visual ID.”
You can also delete “Visual ID” on your Echo Show. Start by selecting Settings on the home screen. Choose “Profiles” and then select “Your Profile.” Finally, choose “Visual ID” and then “Delete Visual ID.”
Just to note Visual IDs will also be deleted from an Amazon Echo Show if you factory reset the device. As an added security precaution, after 18 months if your Visual ID hasn’t been recognized, it will automatically be deleted.
There are also two ways to temporarily disable Visual ID on an Amazon Echo Show. You can press the mic/camera on/off button on the device or physically close the camera shutter. Opening the camera shutter or pressing the mic/camera button again will once again enable the feature.
source

