PowerShell makes renaming files from the command line super easy. You can use specific names, add increasing numbers, add prefixes and suffixes, and even append timestamps. We’ll show you how to do that all on your Windows 11 or Windows 10 computer.
Before You Begin: Learn How to Find a File or Folder’s Full Path
To rename files, you’ll have to provide PowerShell with your file or parent folder’s full path. If you know how to do this, skip to the relevant section below. If you aren’t quite sure how to get a folder or file’s full path, we’ll show you.
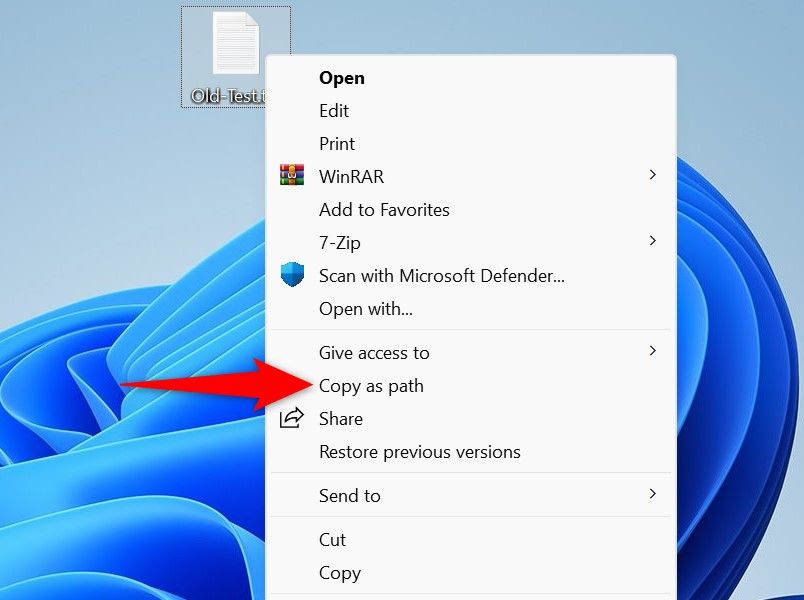
Open a File Explorer window and find your file or folder. Press and hold down the Shift key on your keyboard, right-click your file or folder, and choose “Copy as Path.”
That action has copied your selected item’s full path to your clipboard. You can now paste this path wherever required in the commands below.
How to Rename a Specific File
To give a new name to a specific file on your PC, use PowerShell’s Rename-Item cmdlet. This cmdlet takes your file’s full path, the new name you want to assign, and renames your file.
To use it, launch a PowerShell window on your PC and type the following command. In the command, replace PATH with the full path to your file. Your path should have the file’s full name as well as the extension. Replace MyName with the new name you want to use, and ext with your file’s original extension.
Rename-Item PATH -NewName MyName.ext
Make sure to use your file’s original extension when you rename the file. Using another extension can make your file unusable.
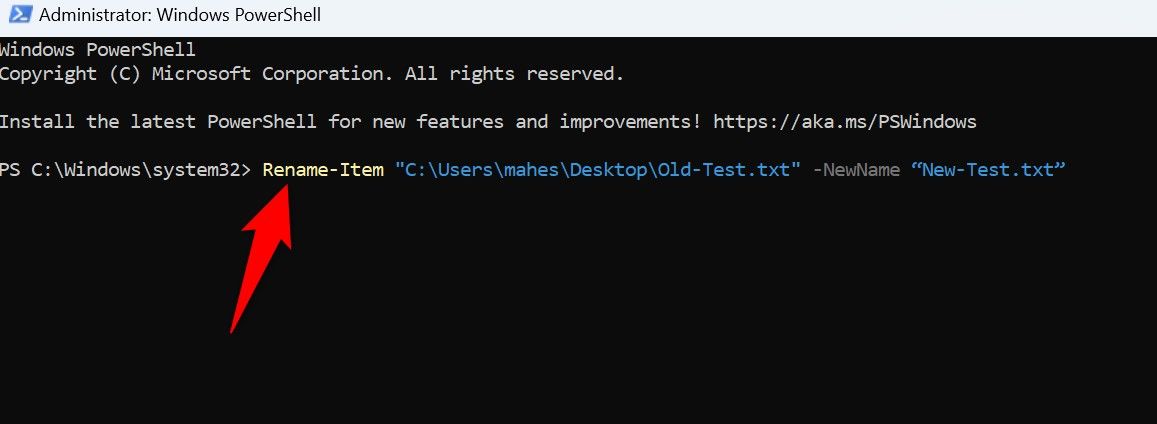
As an example, to rename a file named Old-Test.txt located on your desktop to New-Test.txt, you’d use the following command:
Rename-Item "C:UsersUsernameDesktopOld-Test.txt" -NewName “New-Test.txt”
PowerShell won’t display a message confirming your file is renamed, but know that the job is done.
How to Rename Files in a Folder With an Increasing Number
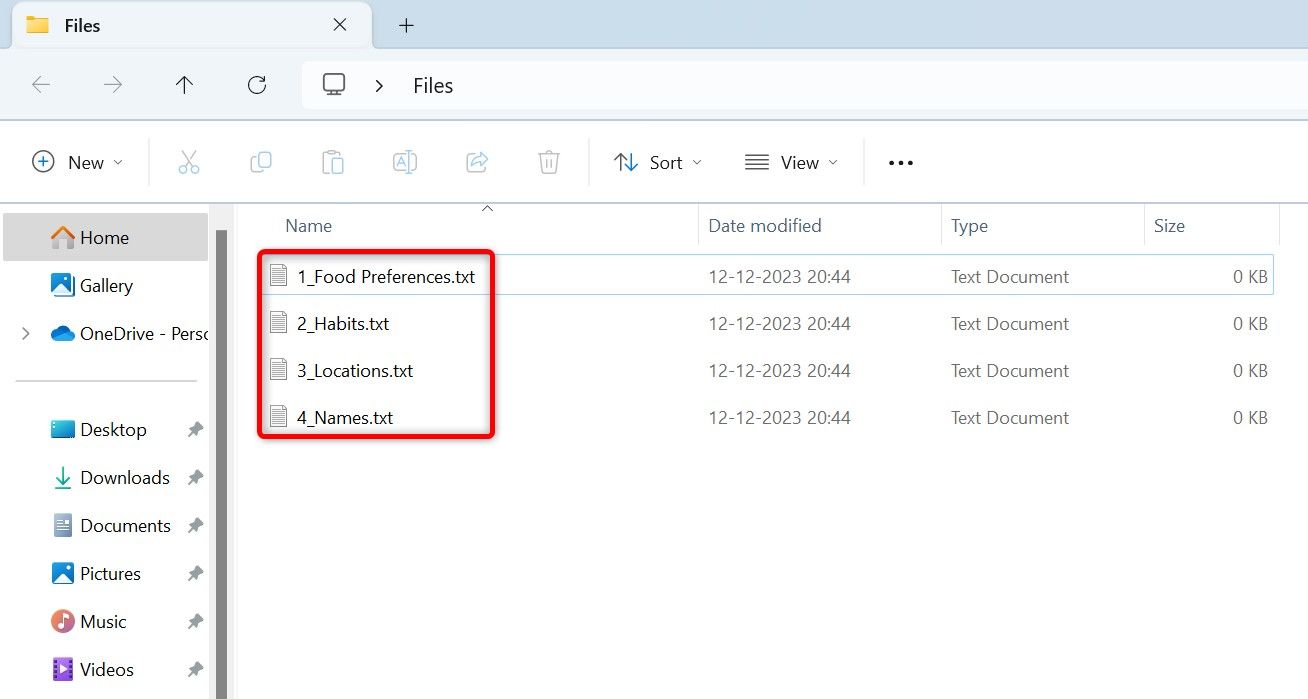
If you want to add an increasing number, such as 1, 2, 3, and so on, to your files in a specific folder, follow these steps.
Launch a PowerShell window and type the following command. Replace PATH with the full path to your folder, and txt with the format of the files to rename. Then, press Enter.
Get-ChildItem PATH -Recurse -Include "*.txt" | ForEach-Object -Begin { $Counter = 1 } -Process { Rename-Item $_.FullName -NewName ("{0}_{1}" -f $Counter, $_.Name) ; $Counter++ }
How to Add a Prefix or Suffix to a File Name
To add text before your file name (known as a prefix), launch a PowerShell window and enter the following command. Replace PATH with your folder’s full path, and PREFIX with the text you want to append, then press Enter.
Get-ChildItem PATH | Rename-Item -NewName {"PREFIX" + $_.Name}
To add text after your file’s name (called a suffix), use the following command, replacing PATH with the full path to your folder, and SUFFIX with the text to append. Then, press Enter.
Get-ChildItem PATH | Rename-Item -NewName {$_.BaseName + "SUFFIX" + $_.Extension}
How to Add Timestamps to All Files in a Folder
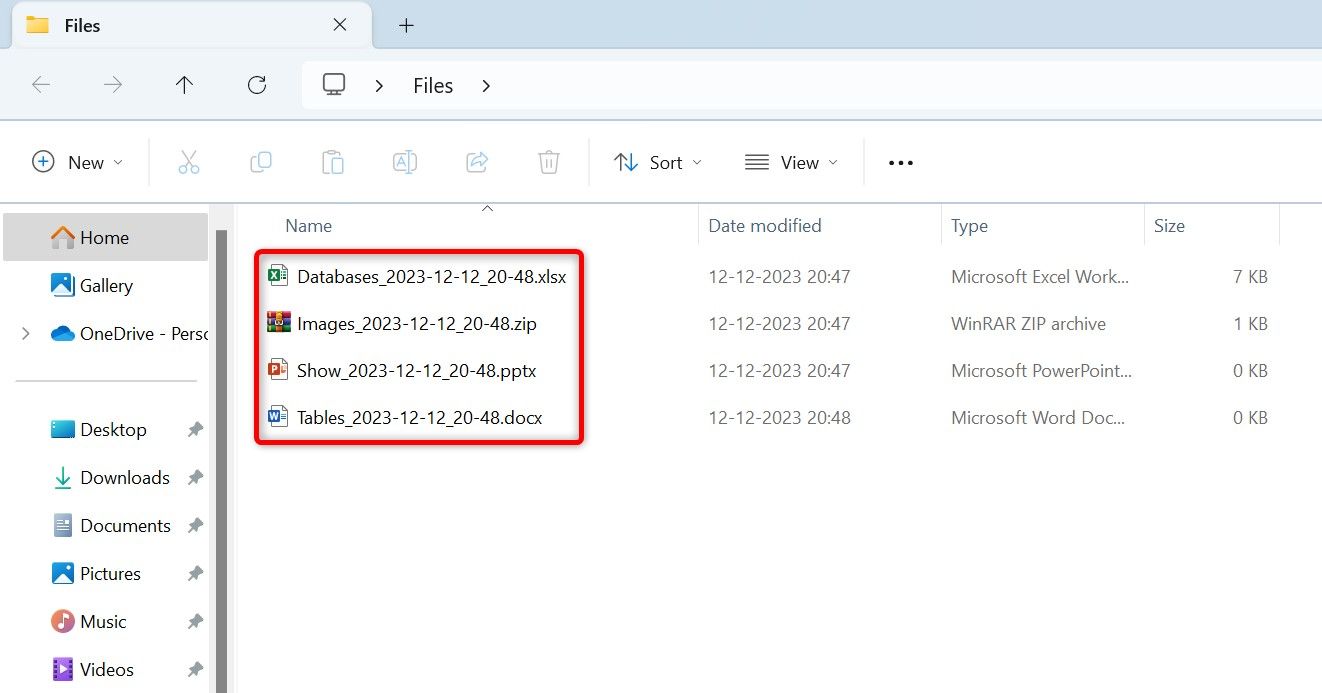
If you want to add a timestamp to all the files in a folder, open PowerShell and type the following command. Replace PATH with the full path to your folder, and press Enter.
Get-ChildItem PATH -Recurse -Include "*.*" | ForEach-Object { Rename-Item -Path $_.FullName -NewName "$($_.DirectoryName)$($_.BaseName)_$(Get-Date -F yyyy-MM-dd_HH-mm)$($_.Extension)"}
The above command uses your computer’s system time. If that time is incorrect, it’s possible to change the timezone on your Windows 11 and Windows 10 PC.
And that’s how you assign new names one file at a time or in bulk on your Windows system, without using File Explorer. It’s just one of the many ways that PowerShell aids with mundane Windows tasks.
source


