The Nintendo 3DS may be over a decade old at this point, but even without the cutoff of official support from Nintendo, it can be a robust piece of hardware for emulation and retro gaming. This guide will inform you on the steps to create your own handheld retro machine out of your old 3DS, whether it’s the “New” model or the original.
What You’ll Need
Before you can begin modding your 3DS system to install external apps and emulators, you will need access to a computer and an SD card. I recommend a 64 gigabyte card so that you are not as limited when it comes to storage space. You may need a USB adapter to insert the SD card into your PC, as many computers do not have SD card slots. You will also, of course, need a 3DS console with a solid internet connection and without any custom firmware already installed. This can be an original model 3DS, 3DS XL or 2DS or a New 3DS model of any type.
You will also need to make sure your computer has any 3.x version of Python and an unzipping program like 7Zip or WinRar installed. Also, keep in mind that this guide was written using a PC installed with Windows 10. While the steps are largely the same, some other operating systems like MacOS or Linux may have slight variations in the steps involved in file transfers and other applications.

First, Know Your Model and Firmware Version
The processes for modding a 3DS vary slightly depending on the model, with the New model requiring a bit more steps. If you’re unsure which version you have, just look for the small, circular joypad to the right of the bottom screen. If you do not have one, it means you have an original model. The result is mostly the same for either one, but you will need to know your system’s version number first. To find this, go to your 3DS’s System Settings app, and the version number will be displayed in the bottom right of the top screen. It is okay to update the system if you wish but note the version number afterward.

Modding an Original 3DS or 2DS
Now that you’re ready to begin, start by opening the Mii Maker app until you see a screen that says “Welcome to Mii Maker;” close the app and power off your system. If you do not see this screen, it just means you’ve opened it before and can move on; all this step does is create the necessary file directory on your system’s SD card.
Remove the SD card from your system and insert it into your PC. Next, you need to download and install MSET9, which is a script that can inject files into your system’s SD card directly. Install the latest version to your computer from the developer’s website and extract the contents of Release_v1.x with an unzipping program to the root of your SD card, which is the first screen that appears when opening it on your PC.
One of the files extracted from the folder should be called mset9.bat. Provided you have Python 3 installed, double-click the file to open a Windows command window

Press any key on your keyboard to initiate the process.
Once prompted, enter your system’s version number and press “Enter.” Provided you see the correct model number and a message letting you know everything is working, press “Enter” again and reinsert the SD card into your 3DS.

The prompt screen that appears when running mset9.bat from your SD card’s root directory.
To install MSET9 onto your 3DS, navigate to the System Settings icon and turn off the system without opening the app.
Turn it back on and then press “A” to open your system settings and find the “Extra Data” files in Data Management > Nintendo 3DS > Extra Data.
You should see the Mii Maker icon.

The “Extra Data” screen of the 3DS’ System Settings, where the Mii Maker icon should appear after opening it.
Leave the console on, remove the SD card and insert it back into your computer.
Open up mset9.bat once more and reenter your system’s version number, which should prompt you to enter a new string. Enter the number “2” and press “Enter”, which should successfully inject MSET9 to your system’s SD card.
Reinsert the card into your 3DS without touching the screen or pressing any buttons, which should prompt the system to boot up the next step.

The second stage of the MSET9 prompt after opening the file from the 3DS’ root directory.
Now it’s time to install custom firmware using boot9strap. After successfully booting up into the SafeB9SInstaller, you should receive a prompt to press a specific combination of buttons to install boot9strap. Do this, and then reboot your system by pressing “A”. Your 3DS should now boot up via the Luma3DS menu, which allows you to tweak various settings, though this is not necessary for modding.
Now that once the initial exploit is installed, you must remove MSET9 from your system to prevent any further issues. Do this by turning off the system and putting the SD card into your computer once more and running the mset9.bat file again. Reenter your version number and press “Enter”, then type the number “3” and press “Enter” again. MSET9 should now be fully removed and you can reinsert your SD card.
Modding a New 3DS or 2DS
For a New 3DS model (any type works, the size or 3D function does not matter), you will first need to download several files. You will need the latest versions of super-skaterhax, the main exploit, SafeB9Installer, boot9strap, nimdsphax and Luma3DS.
Once you have all of those, it’s time to load them on to your SD card. Start by turning off your 3DS and inserting the SD card into your computer and opening it to the root directory (the base screen that appears when you open it.) Copy the two files called “Boot.firm” and “Boot.3dsx” from the Luma3DS folder into the root. Then, copy the files called “Arm11code.bin” and “Browserhax_hblauncher_ropbin_payload.bin” from the folder called “Super-skaterhax” to the root as well.

If your SD card does not already have a folder called 3ds, create one now, then copy the entire folder called “Nimdsphax” to it. Now you can reinsert the SD card into your 3DS and turn it on.
You will need to access a webpage via the 3DS’ web browser function, which you can do manually or via the system’s camera with a QR code. To use the camera, open it up by pressing down on the left and right shoulder buttons on the back of the system. From there, you can scan a QR code with your system’s built-in camera to access the browser page for the next step. Alternatively, you can go to your internet browser and type in the URL manually, which can be found here.

Press “allow” on any and all security warnings and then press “Select” to open the bookmark tab and tap “Bookmark this Page” and press “B” to return to the browser. Press “Start” and then tap Settings > Delete Cookies and press “A”. Press the “Home” button to return to the 3DS’ home screen and then reopen the browser.
You should see a prompt saying “GO GO!” in all capital letters. Tap on it and approve any prompts that follow.

Your system should now boot up with the Homebrew Launcher. From there, find the file called “Nimdsphax” and launch it. Enter the proper key combo when prompted and wait as it installs boot9strap, which will finalize the installation of the custom Luma3DS firmware.
Once finished, press “A” to reboot the system, which should now boot using Luma3DS firmware. For the purpose of this guide, do not change any of its default settings and press “Start” to reboot once more. Keep in mind that the system will not appear any different than usual, but rest assured, as long as it boots up, you have done your job properly.

The available apps and files on the 3DS viewed from the Homebrew Launcher, where you will find the necessary app.
Finalizing the Installation
Power off your system and insert the SD card into your computer once again. Download the finalizer package file here and copy the contents of the main zip file to your SD card root, then reinsert it into your system.
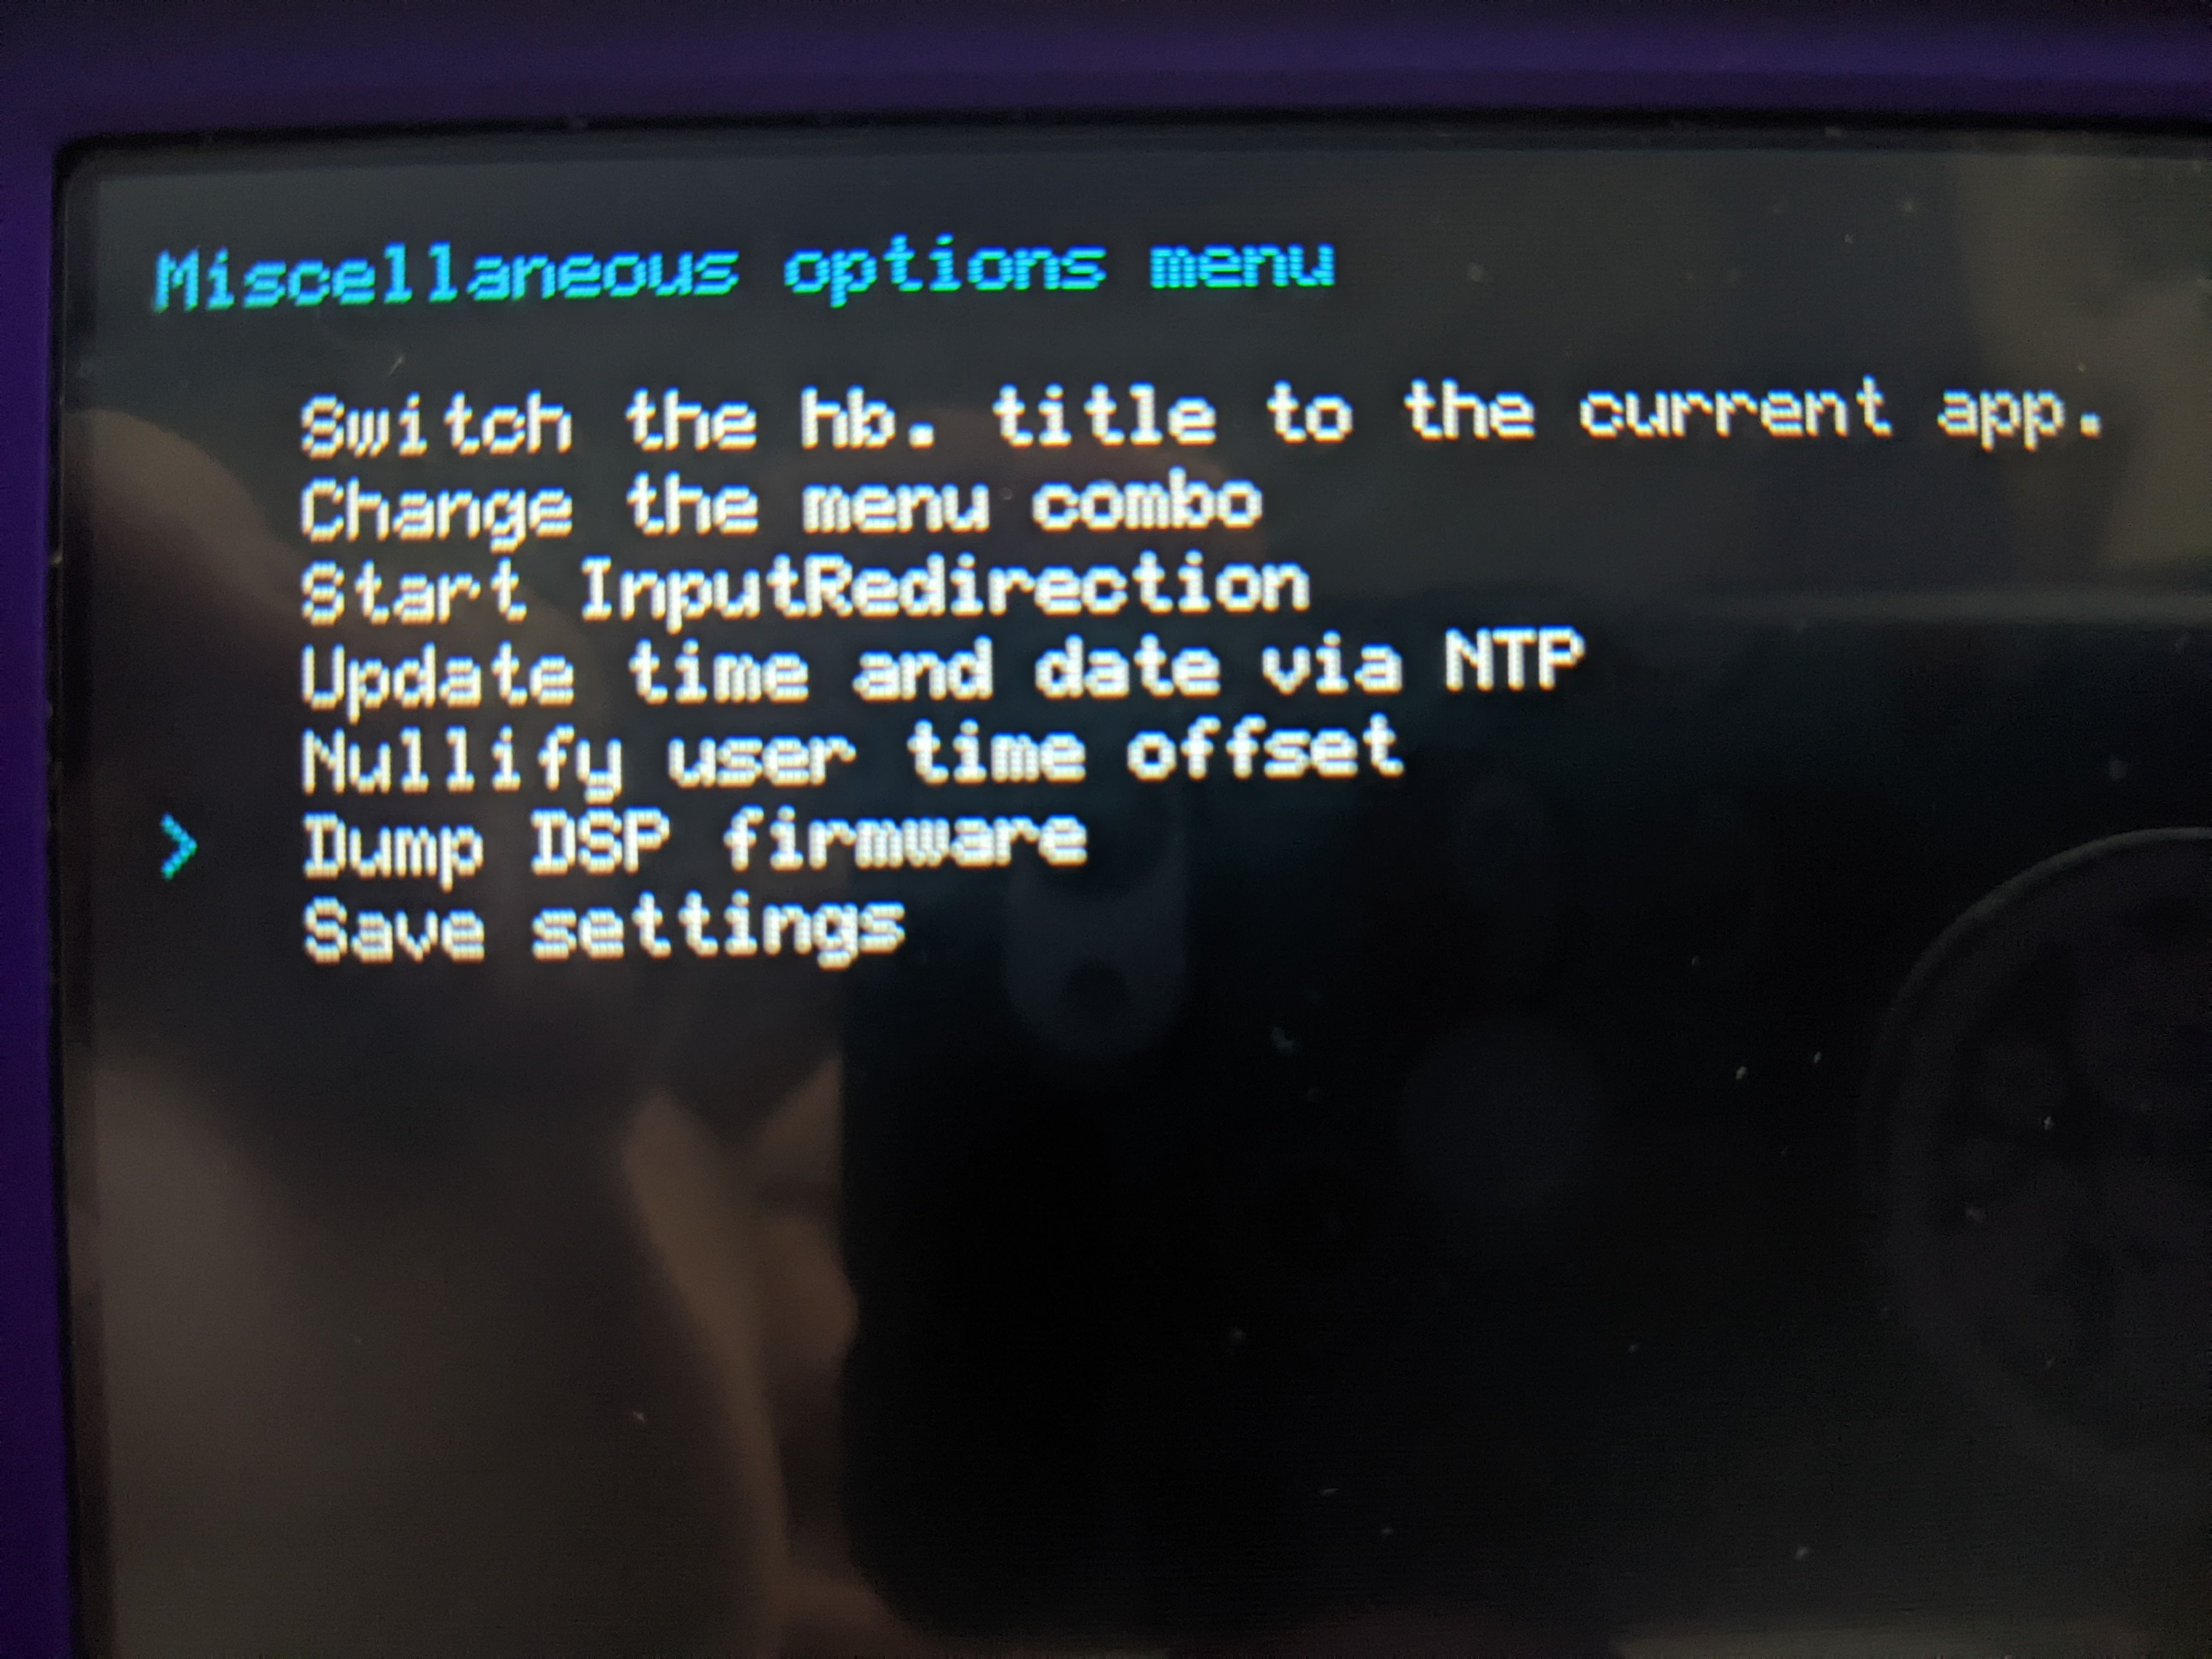
Now, we have to ensure that sound will work correctly in homebrew software. Go to the Rosalina menu by pressing the left shoulder on the back of your 3DS, down on the directional pad and the “Select” button at the same time. Navigate to “Miscellaneous options” and open it.

Click on “Dump DSP firmware” and press “A”, then click “Nullify User Time Offset” and press “B” twice to close the menu. Now, the internal clock on the 3DS will sync in real-time and avoid any potential discrepancies with software.
Before you can install other external apps like retro game emulators, you need to set up a script to automatically install new homebrew applications. Turn your system off again and hold “Start” while you turn it on again. Press “A” to approve any prompts and then press “Home”, then select “Scripts” and then “NANDManager”, then click “Finalize,” answering any prompts along the way.
Then, turn off your system again and reinsert the SD card into your PC. You are going to create a backup of all your current files. Simply copy the folder called /gm9/backups/ to a safe place and delete the existing folder along with any leftover SysNAND files.
Emulators and Apps
After you’ve set everything up, it’s time to install some emulators and enjoy some old-school gaming! There are a wide array of emulators for various older consoles available for the 3DS via Homebrew, from the NES and Super Nintendo to even the original PlayStation, though only on New 3DS models. The most common SNES emulator is Snes9x, which has an official 3DS version here. Simply download the file and copy it to the root of your SD card along with a few SNES ROMs and launch them via the Homebrew Launcher app by selecting the file with the corresponding name. The process is the same for any emulators running via Homebrew.
For Game Boy Advance and original DS games, the 3DS can already run them natively either through the use of the DS firmware TwilightMenu or the GBA firmware found here. Through the use of Homebrew apps like FBI, many of these games can also be injected as emulated “virtual console” versions that will appear as official game icons on the 3DS’ home screen, though it requires an external PC app and a long process all on its own. For now, though, you can enjoy classic games from the NES to the original DS with just some minor file transfers, letting you enjoy your favorite retro games from anywhere you may go.
source