Quick Links
Key Takeaways
- To add a horizontal line in your document, from Google Docs’ menu bar, select Insert > Horizontal Line.
- To add a vertical line, from the Docs’ menu bar, select Insert > Drawing > New. Choose the “Line” option, hold down Shift and draw a vertical line, and select “Save and Close” in the top-right corner.
If you’re looking to separate sections or add columns to your Google Docs document, it’s easy to add both horizontal and vertical lines. You have multiple ways to add these lines to your docs, and we’ll show you how.
Add a Horizontal Line in a Google Docs Document
To add a horizontal line (left to right) in your Google Docs document, there are two methods: use an option in Docs’ menu bar or customize your paragraph styles so a line appears after your paragraph.
Here’s how to use both methods.
The easiest way to add a horizontal line in Google Docs is through the dedicated menu option. Once clicked, Docs simply adds a line in your document, job done.
To use it, first open your document on Google Docs. Then, click to set the text cursor where you want the line to appear.
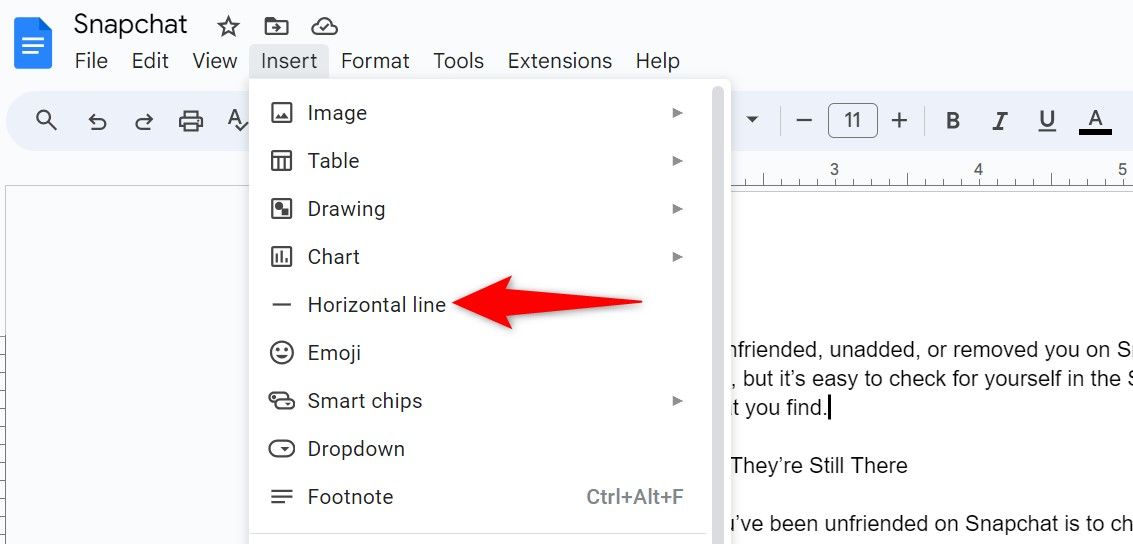
Next, from Google Docs’ menu bar, select Insert > Horizontal Line.
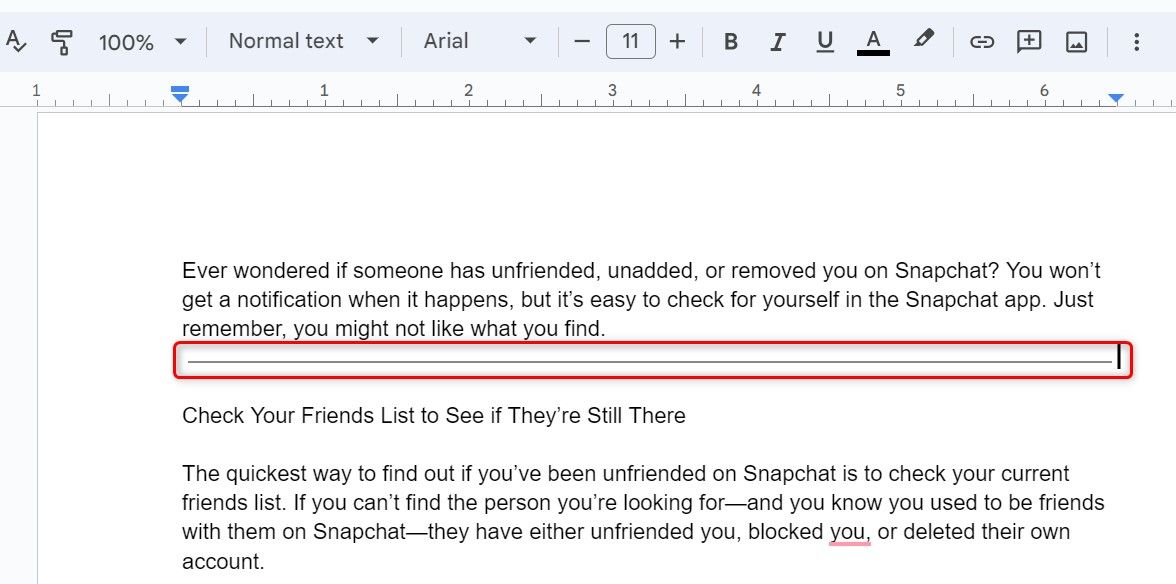
As soon as you click that option, Docs adds a horizontal line.
If you add any content above the line, the line will automatically shift down, so you don’t have to adjust it manually.
If you’d like to remove the line, double-click it and press the Delete key.
2. Use Paragraph Styles
Another way to add a horizontal line in Google Docs is by using paragraph styles. Here, you customize your paragraph’s style, making it display a line.
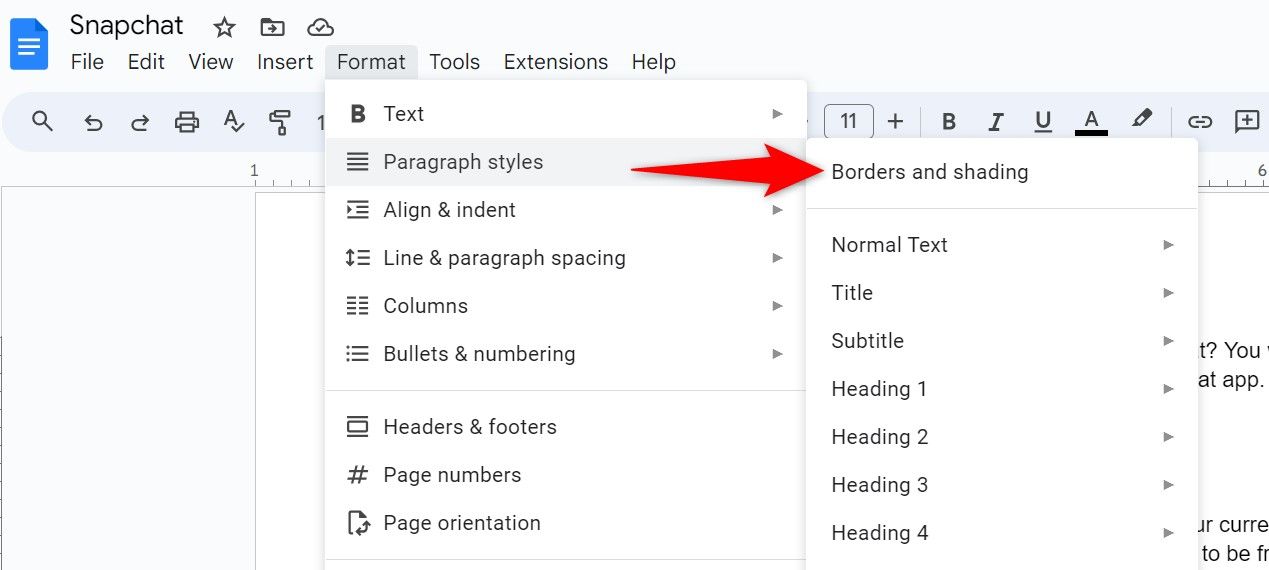
To do that, when your Google Docs document is open, select Format > Paragraph Styles > Borders and Shading from the menu bar.
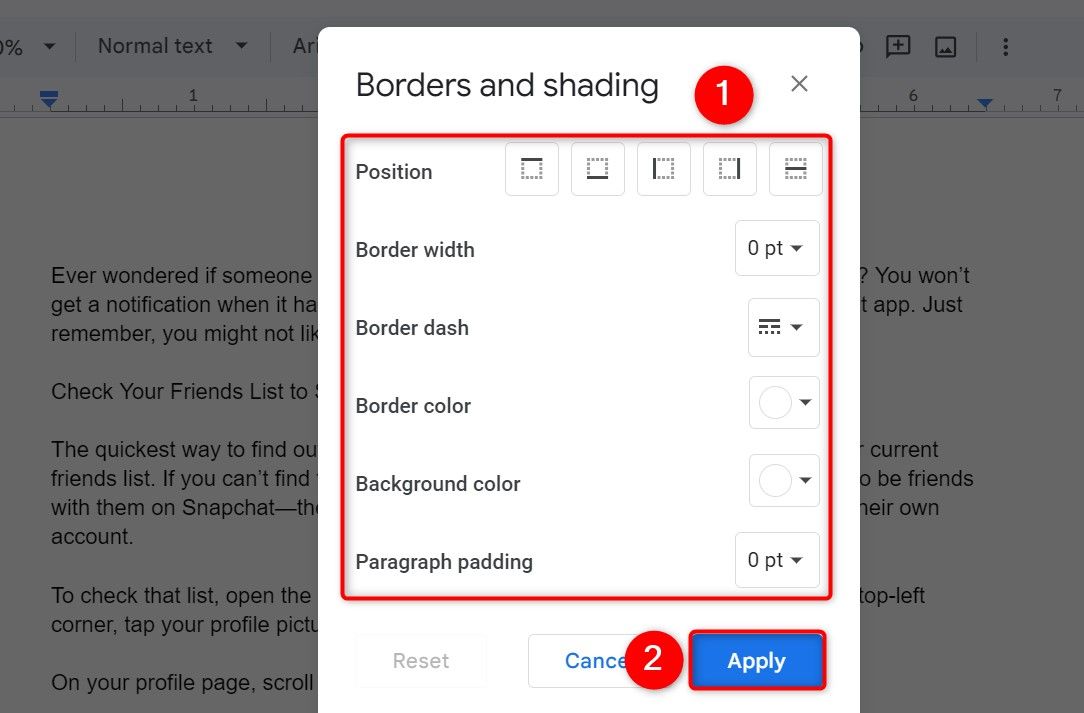
On the “Borders and Shading” window, select the position, width, dash, and other options for your line. Then, choose “Apply” to add the line to your document.
You now have your customized line in your document.
Add a Vertical Line in a Google Docs Document
To add a vertical line (top to bottom) in your Google Docs document, you have a couple of choices. You can use Docs’ drawing tool to draw a line and add it to your document, or you can create columns that display a line between your pieces of text.
Here’s how to use both methods.
1. Use the Drawing Tool
An easy way to add a vertical line in your document is to use Google Docs’ drawing tool. Here, you draw the kind of line you want in your document and then insert that line.
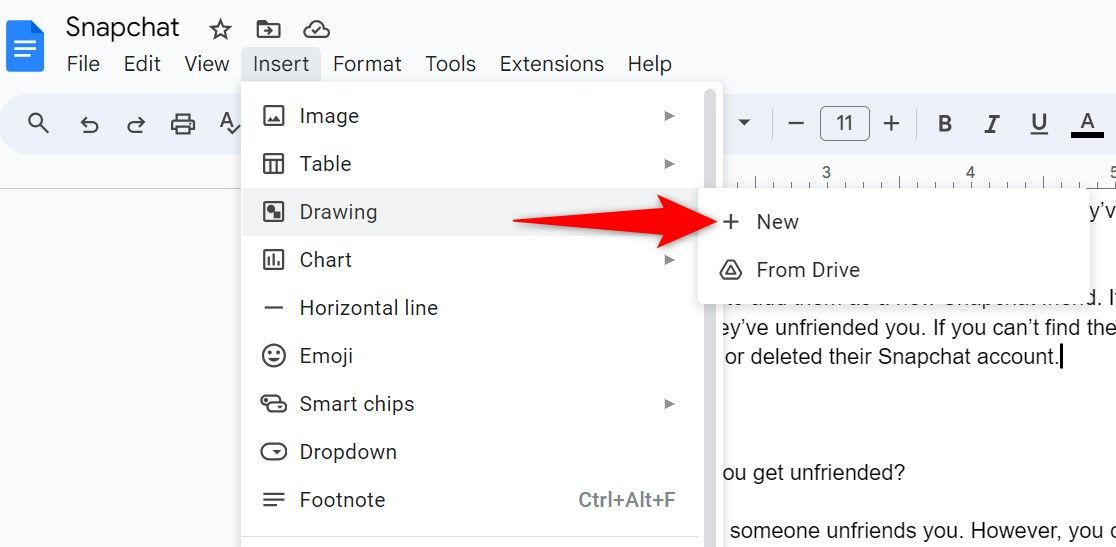
To start, launch your Google Docs document, and from the menu bar, select Insert > Drawing > New.
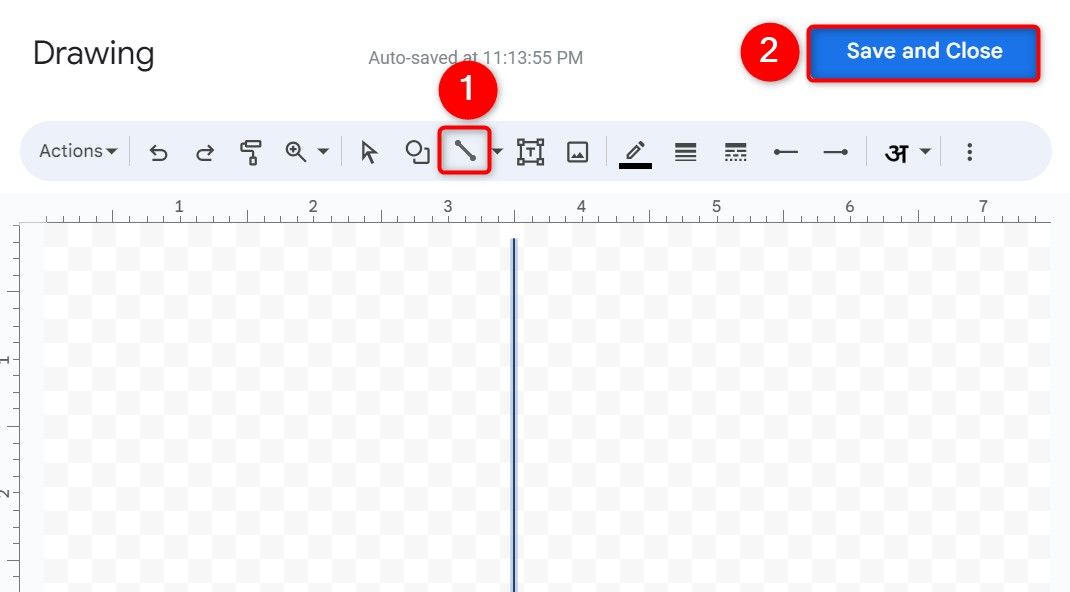
On the “Drawing” window, from the tools list at the top, select the “Line” option. Press and hold down the Shift key on your keyboard and draw a vertical line on the canvas. Holding down the Shift key ensures your line is straight.
When you’ve created your desired line, in the open window’s top-right corner, click “Save and Close.”
Google Docs adds your drawn line to your document. You can change the line’s position and place it anywhere you want by clicking and dragging it.
2. Use Columns
Another way to add a vertical line in Google Docs is to use the columns feature. Here, you divide your text into multiple columns, with a line separating those columns.
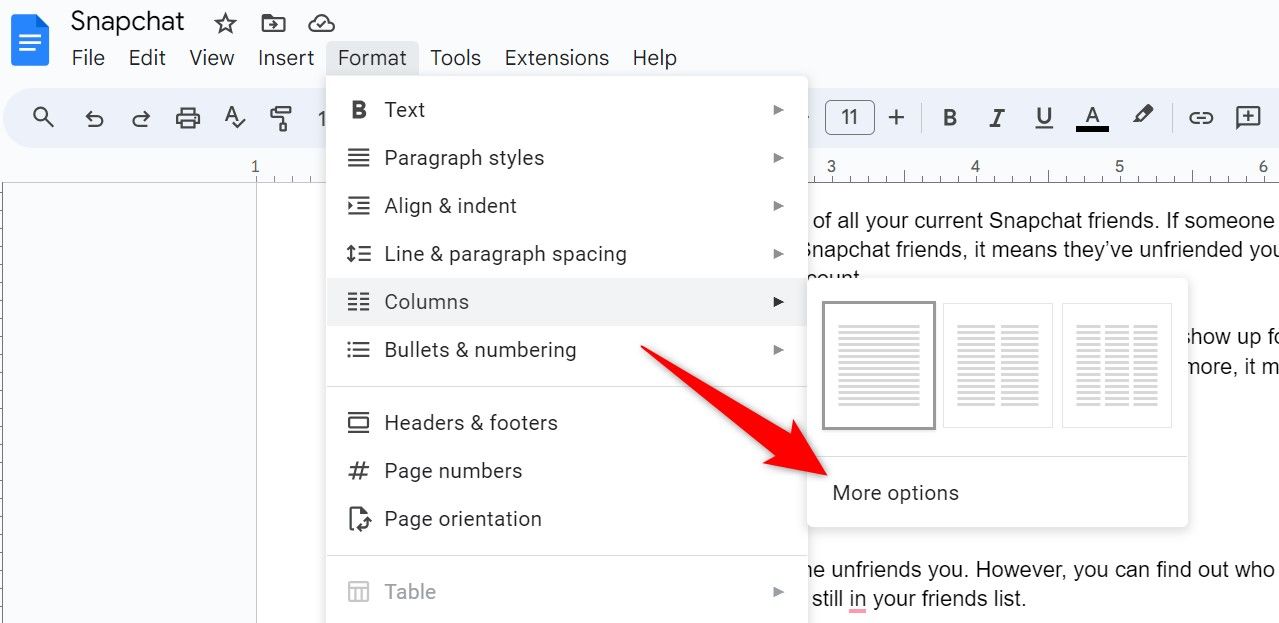
To use that feature, from your Google Docs’ menu bar, select Format > Columns > More Options.
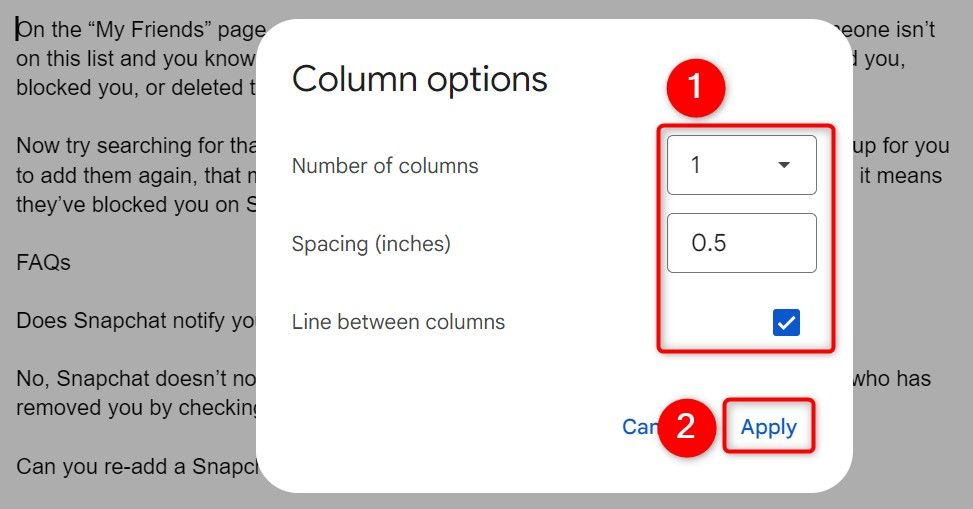
On the “Column Options” window, in the “Number of Columns” box, choose the number of columns you want in your document. If you add two columns, it will add one vertical line, and so on. In the “Spacing (Inches)” field, specify the spacing to have between your columns.
Make sure to checkmark the “Line Between Columns” option, as this is the option that adds a vertical line in your document. Then, choose “Apply.”
You now have a vertical line in your document, separating your text columns.
And that’s how you insert two kinds of lines in your Google Docs documents.
source
