Whether you’ve been a Windows or Chromebook user and are finally switching to a Mac, or are investing in one as your first-ever computer, these tips will help you get the most out of your machine.
1. Set Up Your Apple ID
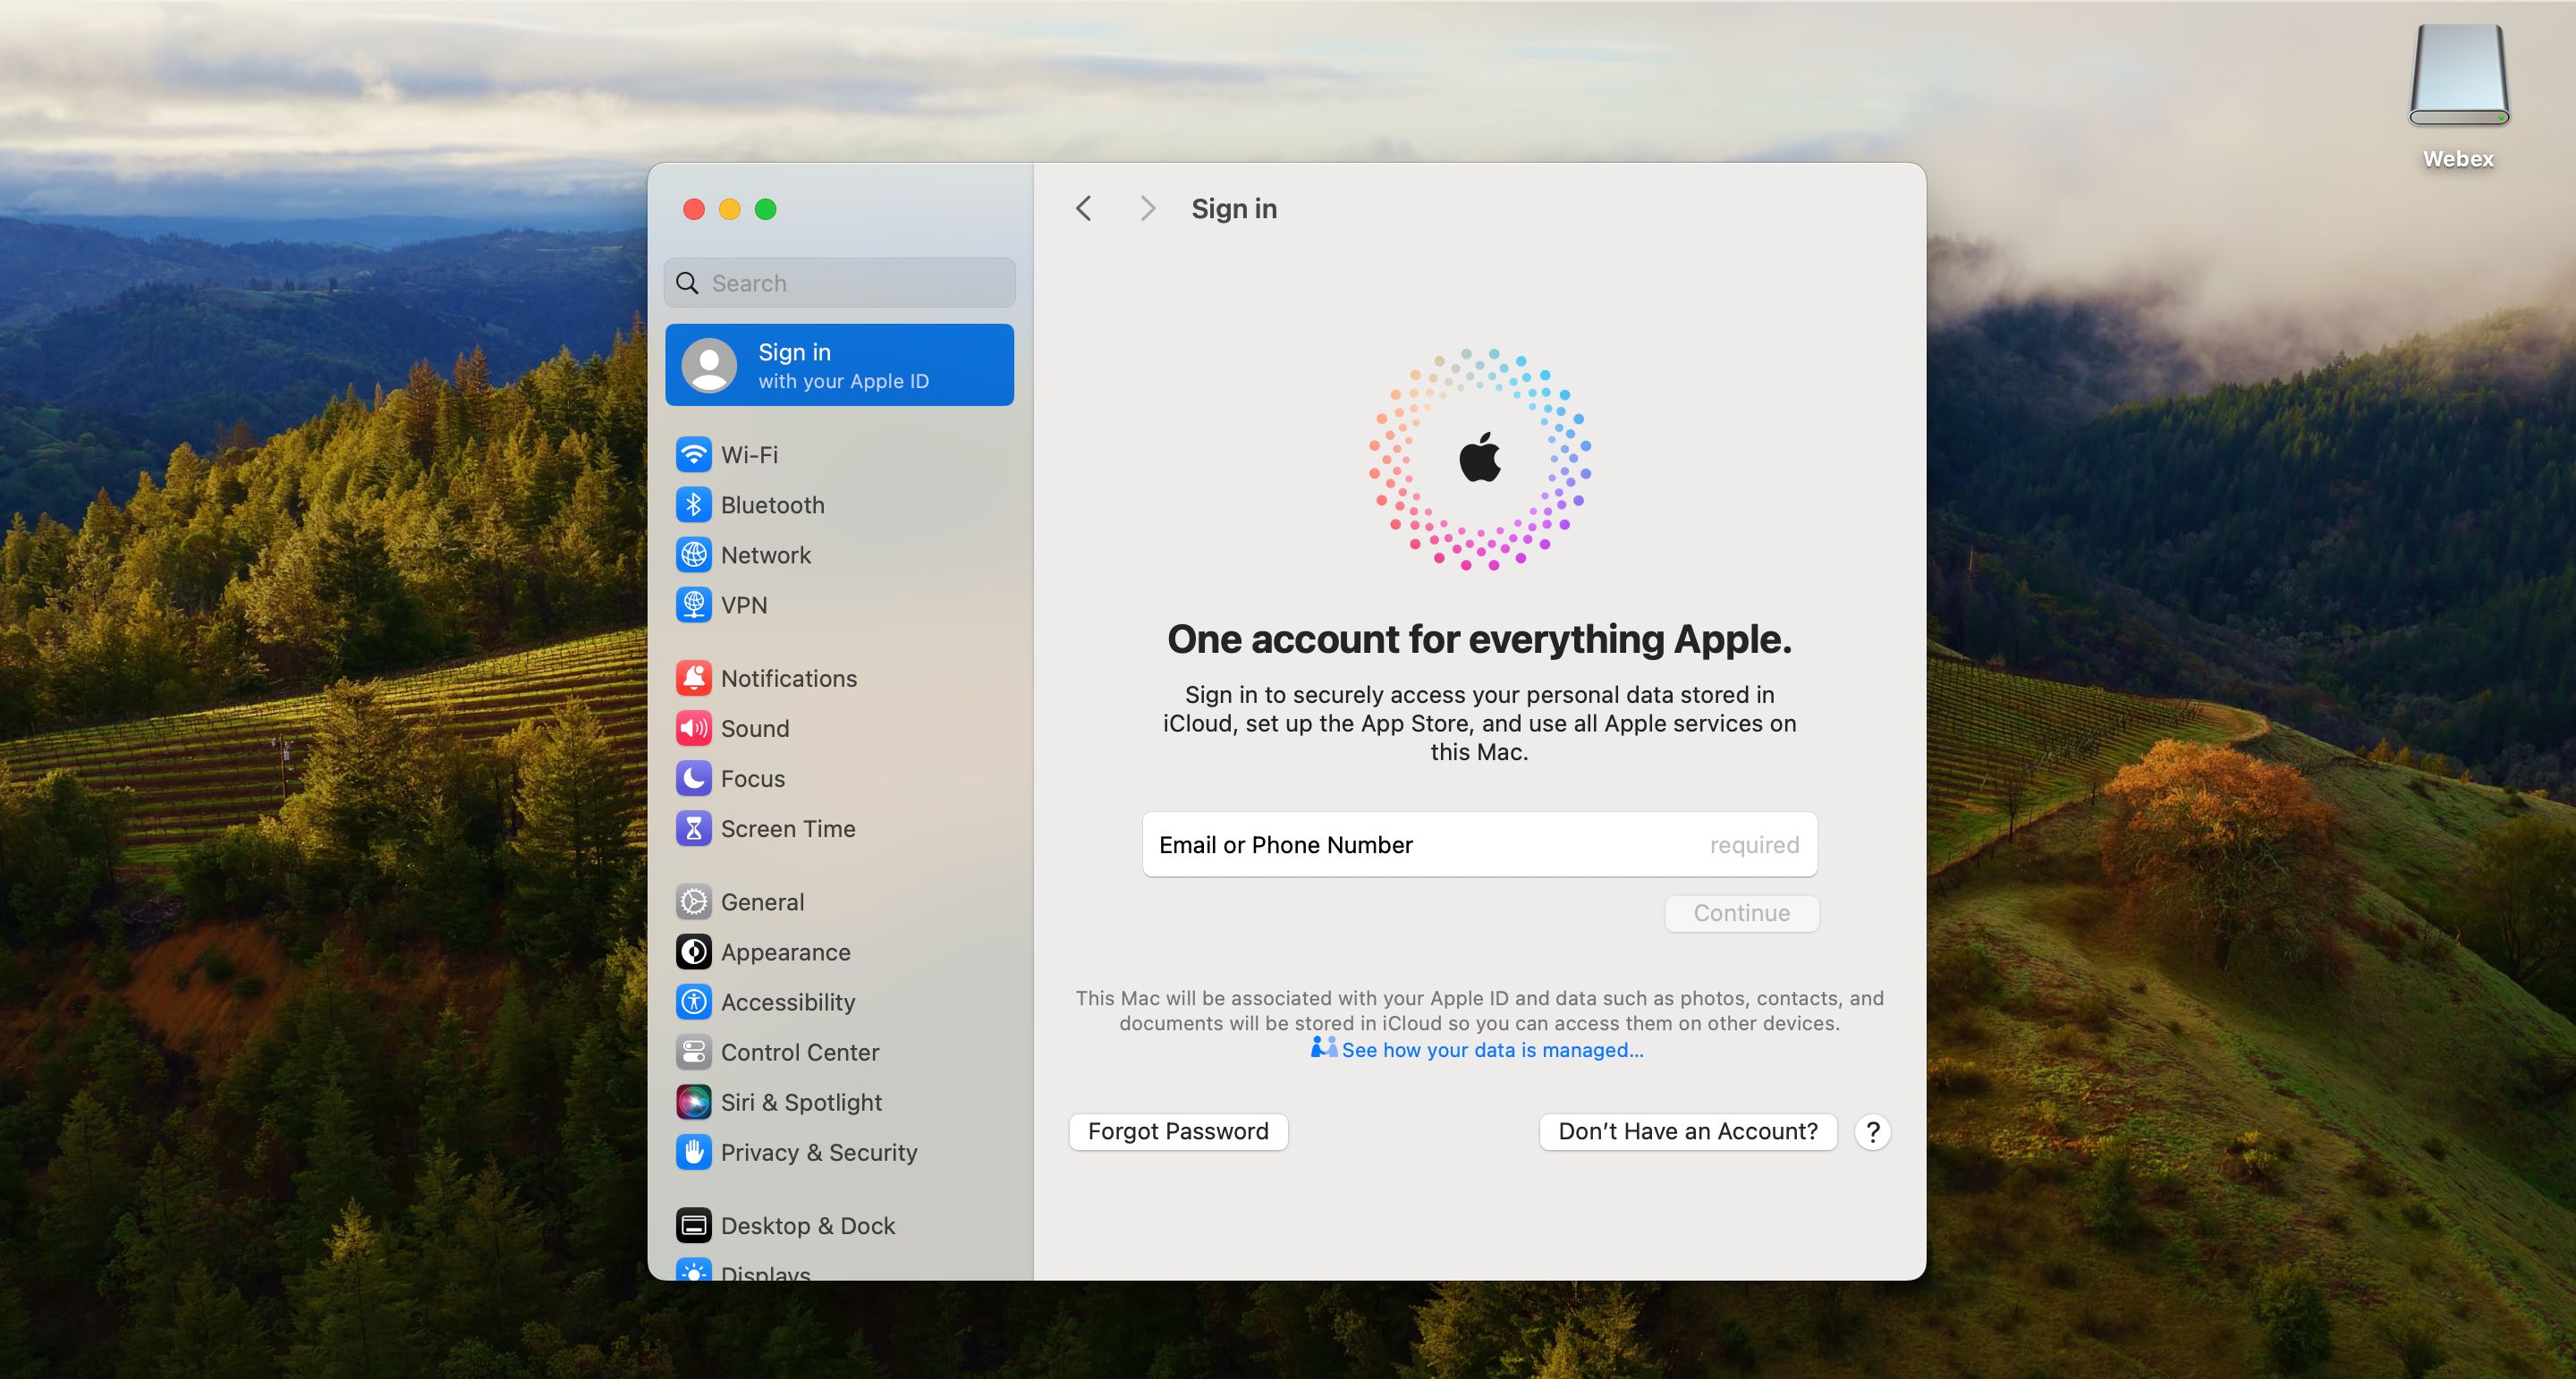
If you’re using an Apple device for the first time, you’ll need to set up an Apple ID. Think of this as your key to Apple’s ecosystem—it essentially allows you to do everything from logging in to iCloud to making purchases on the App Store and more. To set up your Apple ID, navigate to the Apple menu > System Settings > Sign In.
If you already use an iPhone or an iPad, you won’t have to create a new Apple ID. Instead, you can simply sign in with your existing Apple ID on your new Mac. If you no longer have access to your old Apple ID, changing your Apple ID email address is pretty straightforward.
The Apple menu on Macs is denoted by the Apple logo and is located in the top-left corner of your home screen. Clicking the Apple menu icon gives you access to the Mac App Store, and documents and apps you’ve recently opened. You’ll also see options to restart, shut down your Mac, and to put it in sleep mode.
The menu has a Force Quit tab, too, that will help you kill an app or window on your Mac if it stops responding. Most importantly, the Apple menu houses all the system settings and preferences, which are crucial for managing your Mac. It’s wise to get familiar with the Apple menu early on, since it can help you navigate your Mac with ease.
3. Look for OS Updates
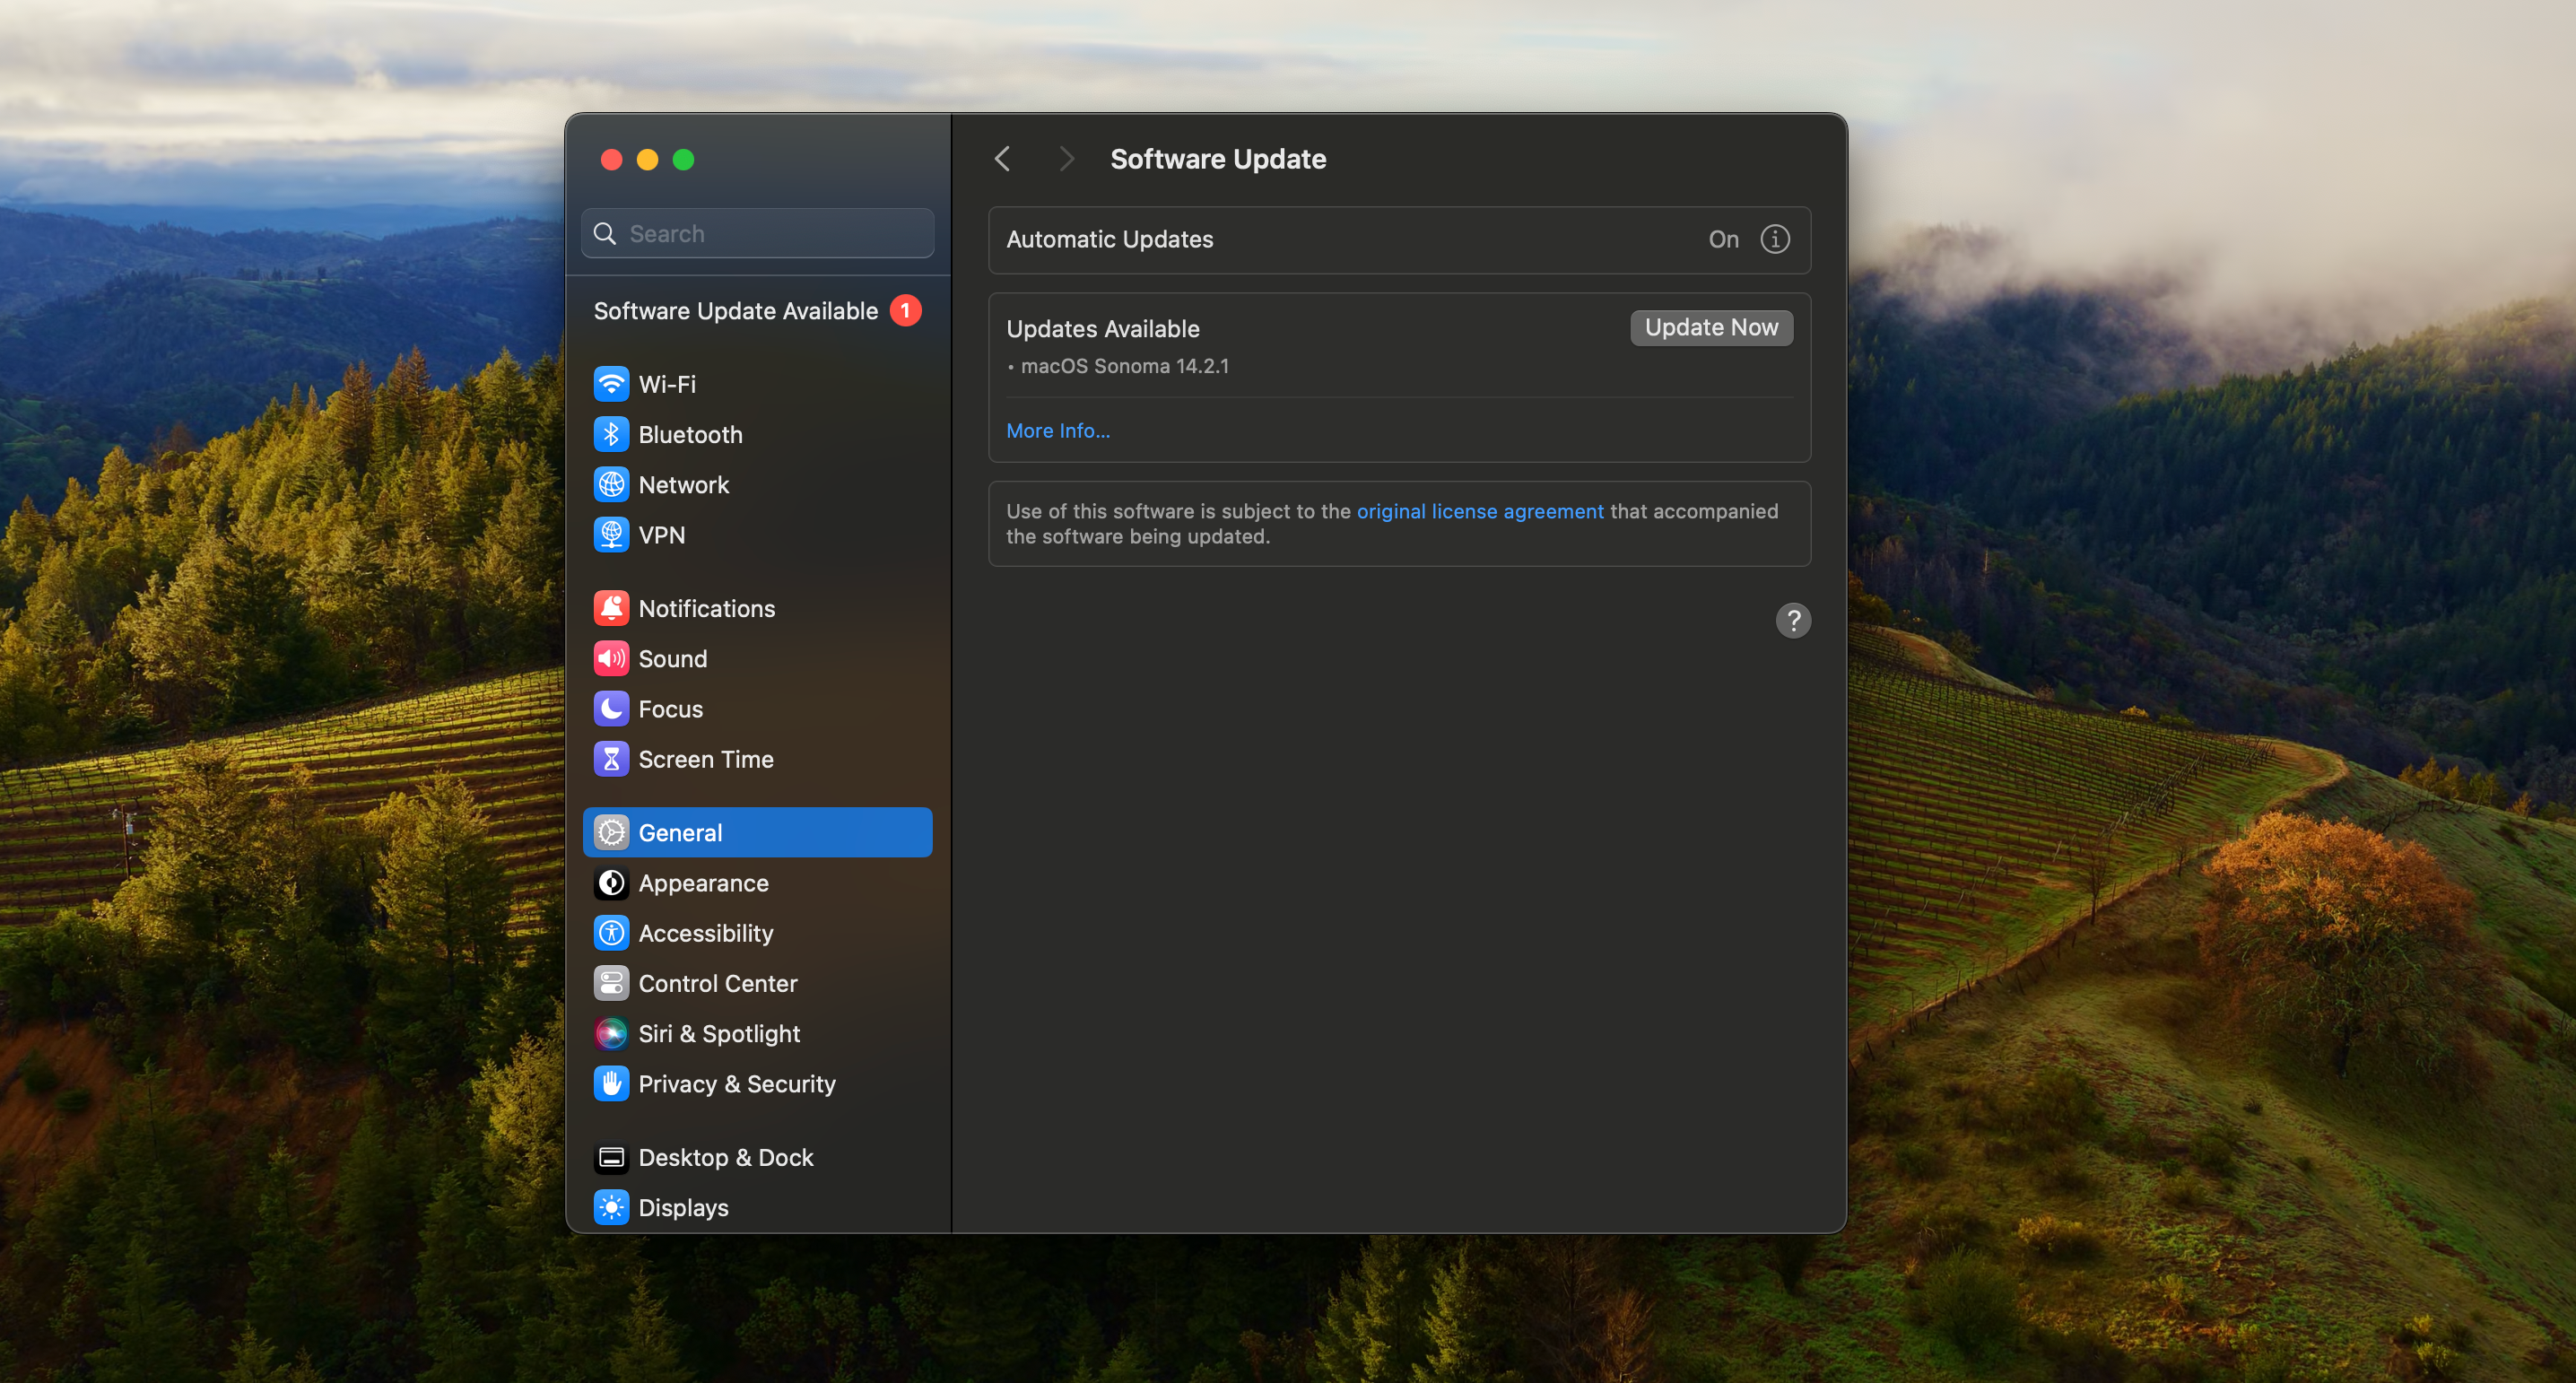
If you’re only just setting up your computer, it’s possible that your macOS isn’t up-to-date. From time to time, Apple releases macOS updates, which can include app updates and security patches. If you receive a notification for available updates, you can install the updates immediately. Alternatively, you can also check for macOS updates manually.
To check for available updates, navigate to the Apple menu > System Settings > General > Software Update. If an update is available, you’ll see the version and an “Update Now” button.
4. Explore Pre-Installed Apps
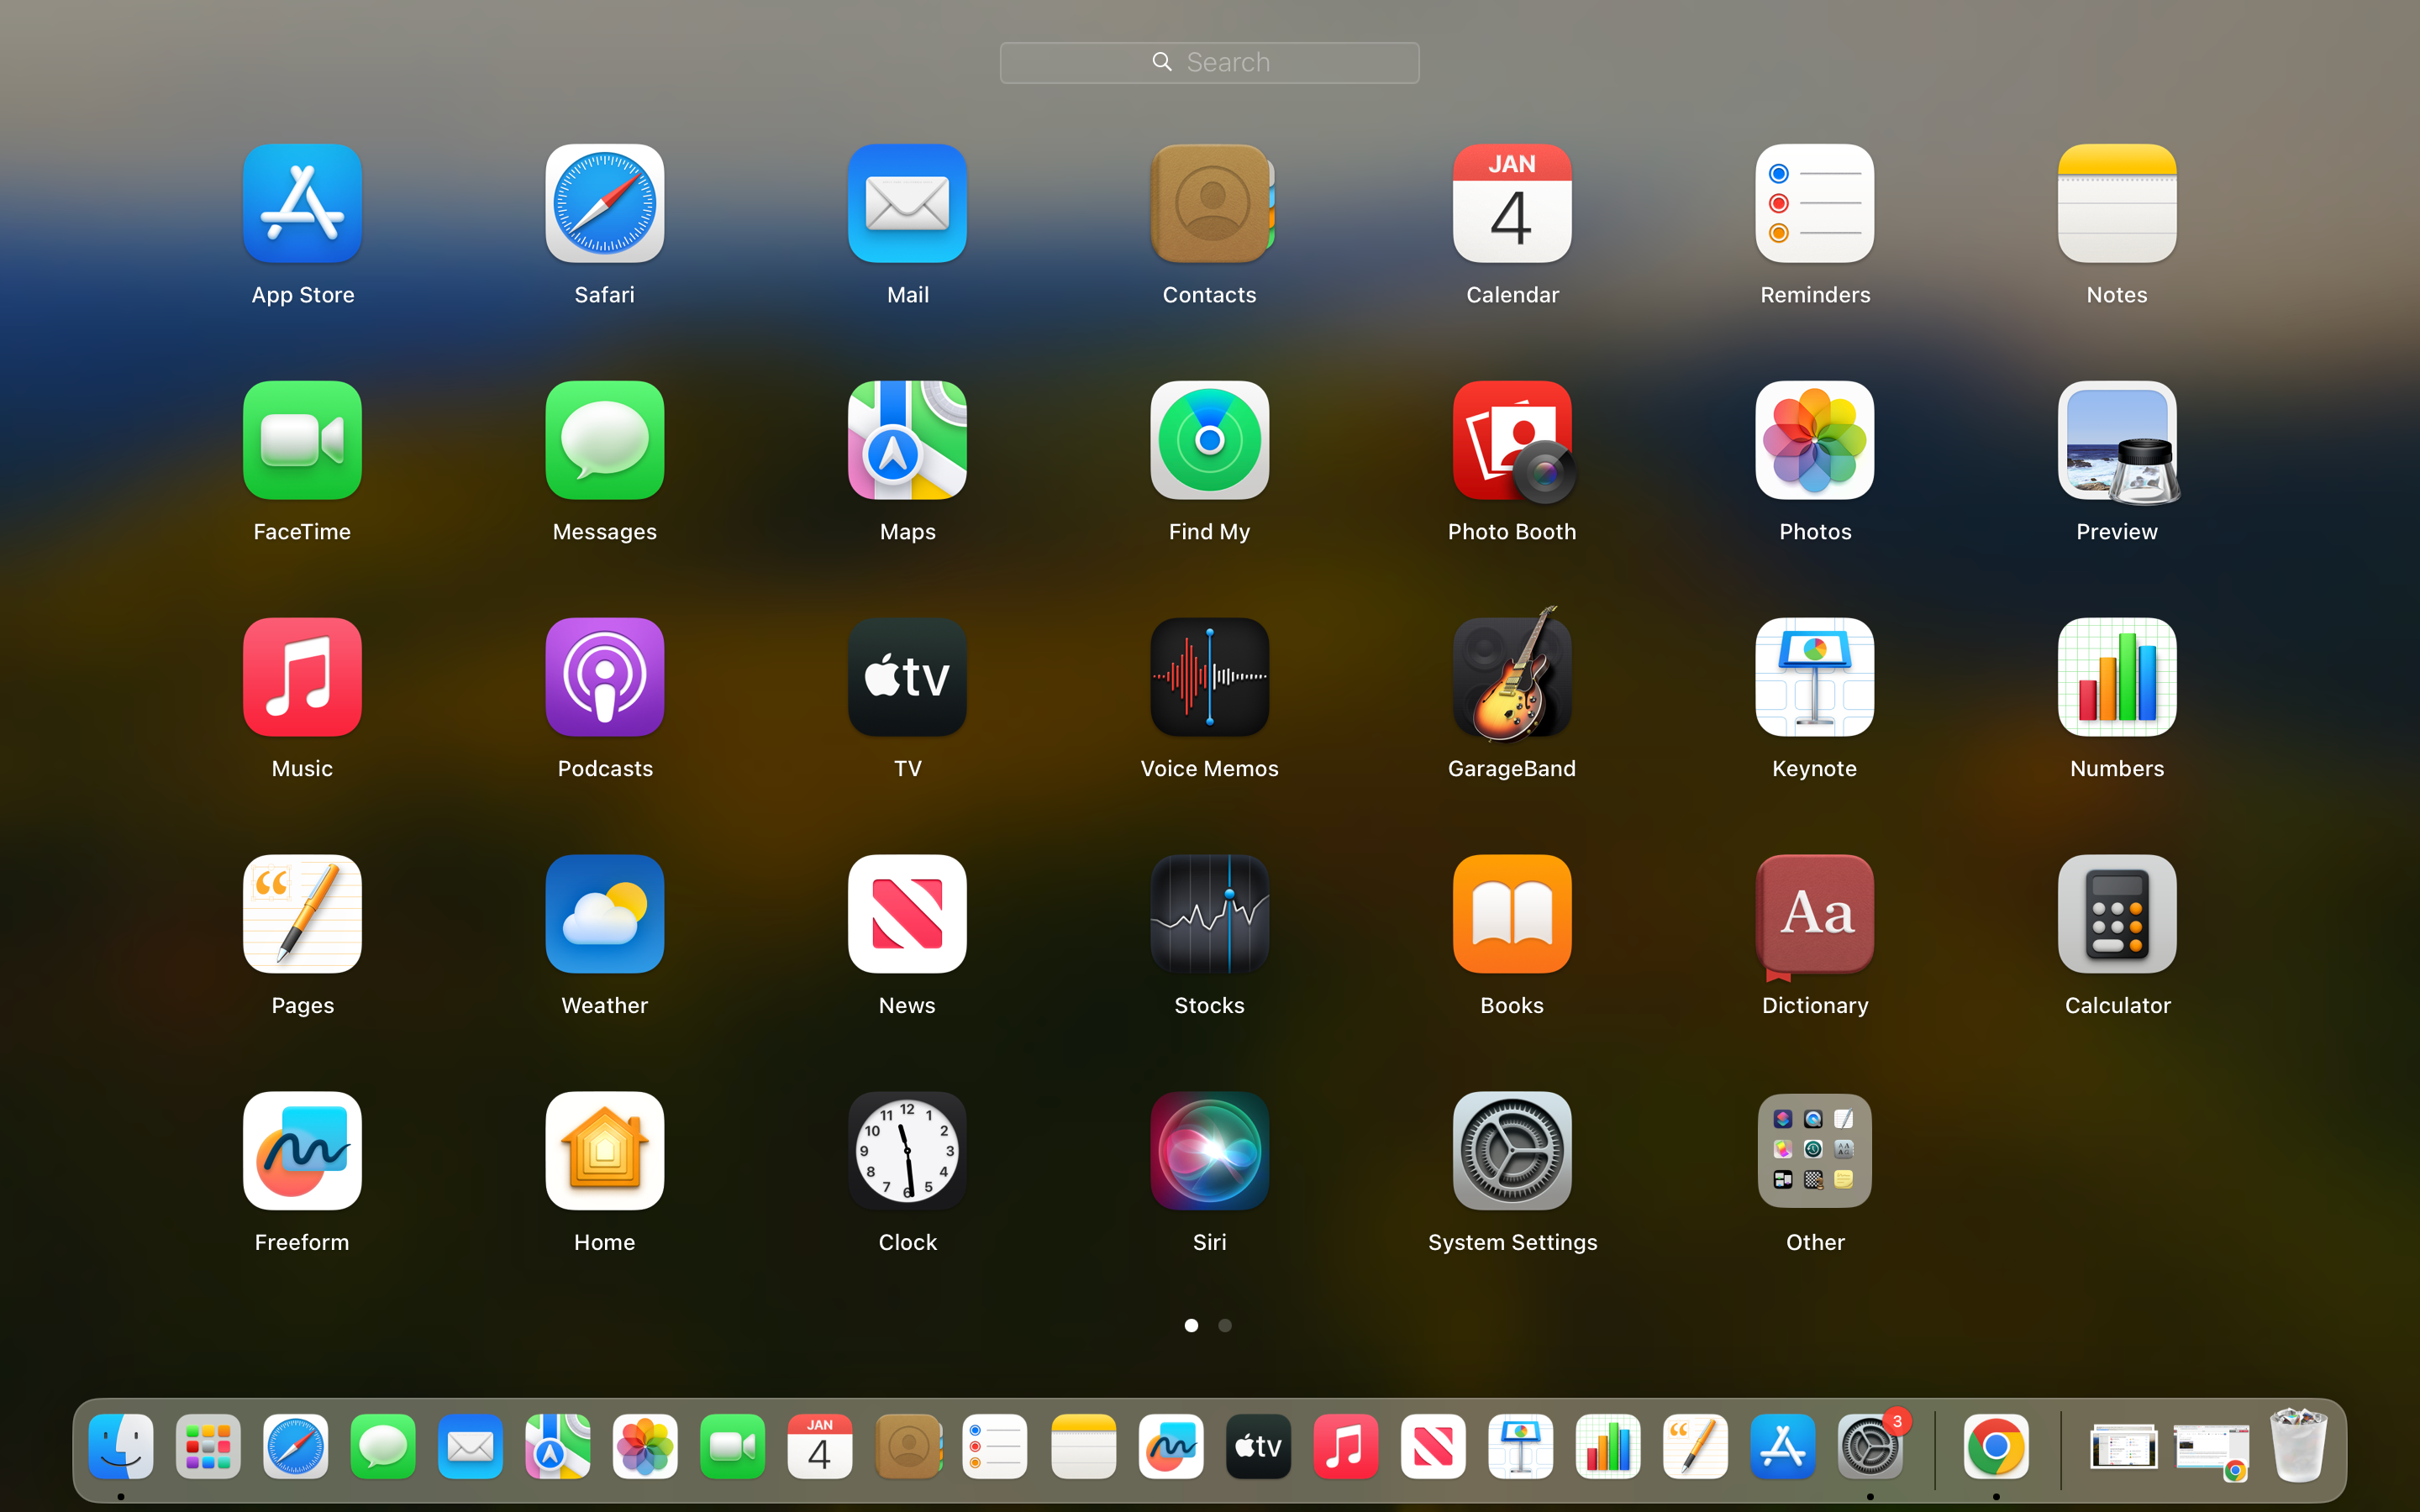
While you don’t have to install new apps on your Mac on the very first day of using it, it’s a good idea to familiarize yourself with the built-in apps. These apps range from Mac productivity tools to entertainment options, and are designed to help you get the most value out of your Mac experience.
To view the built-in apps, select the Launchpad icon in the Dock. A few apps that are worth checking out right at the start include Pages (for creating and editing documents), FaceTime (for video and audio calls), and GarageBand (for music creation).
5. Download Apps From the Mac App Store
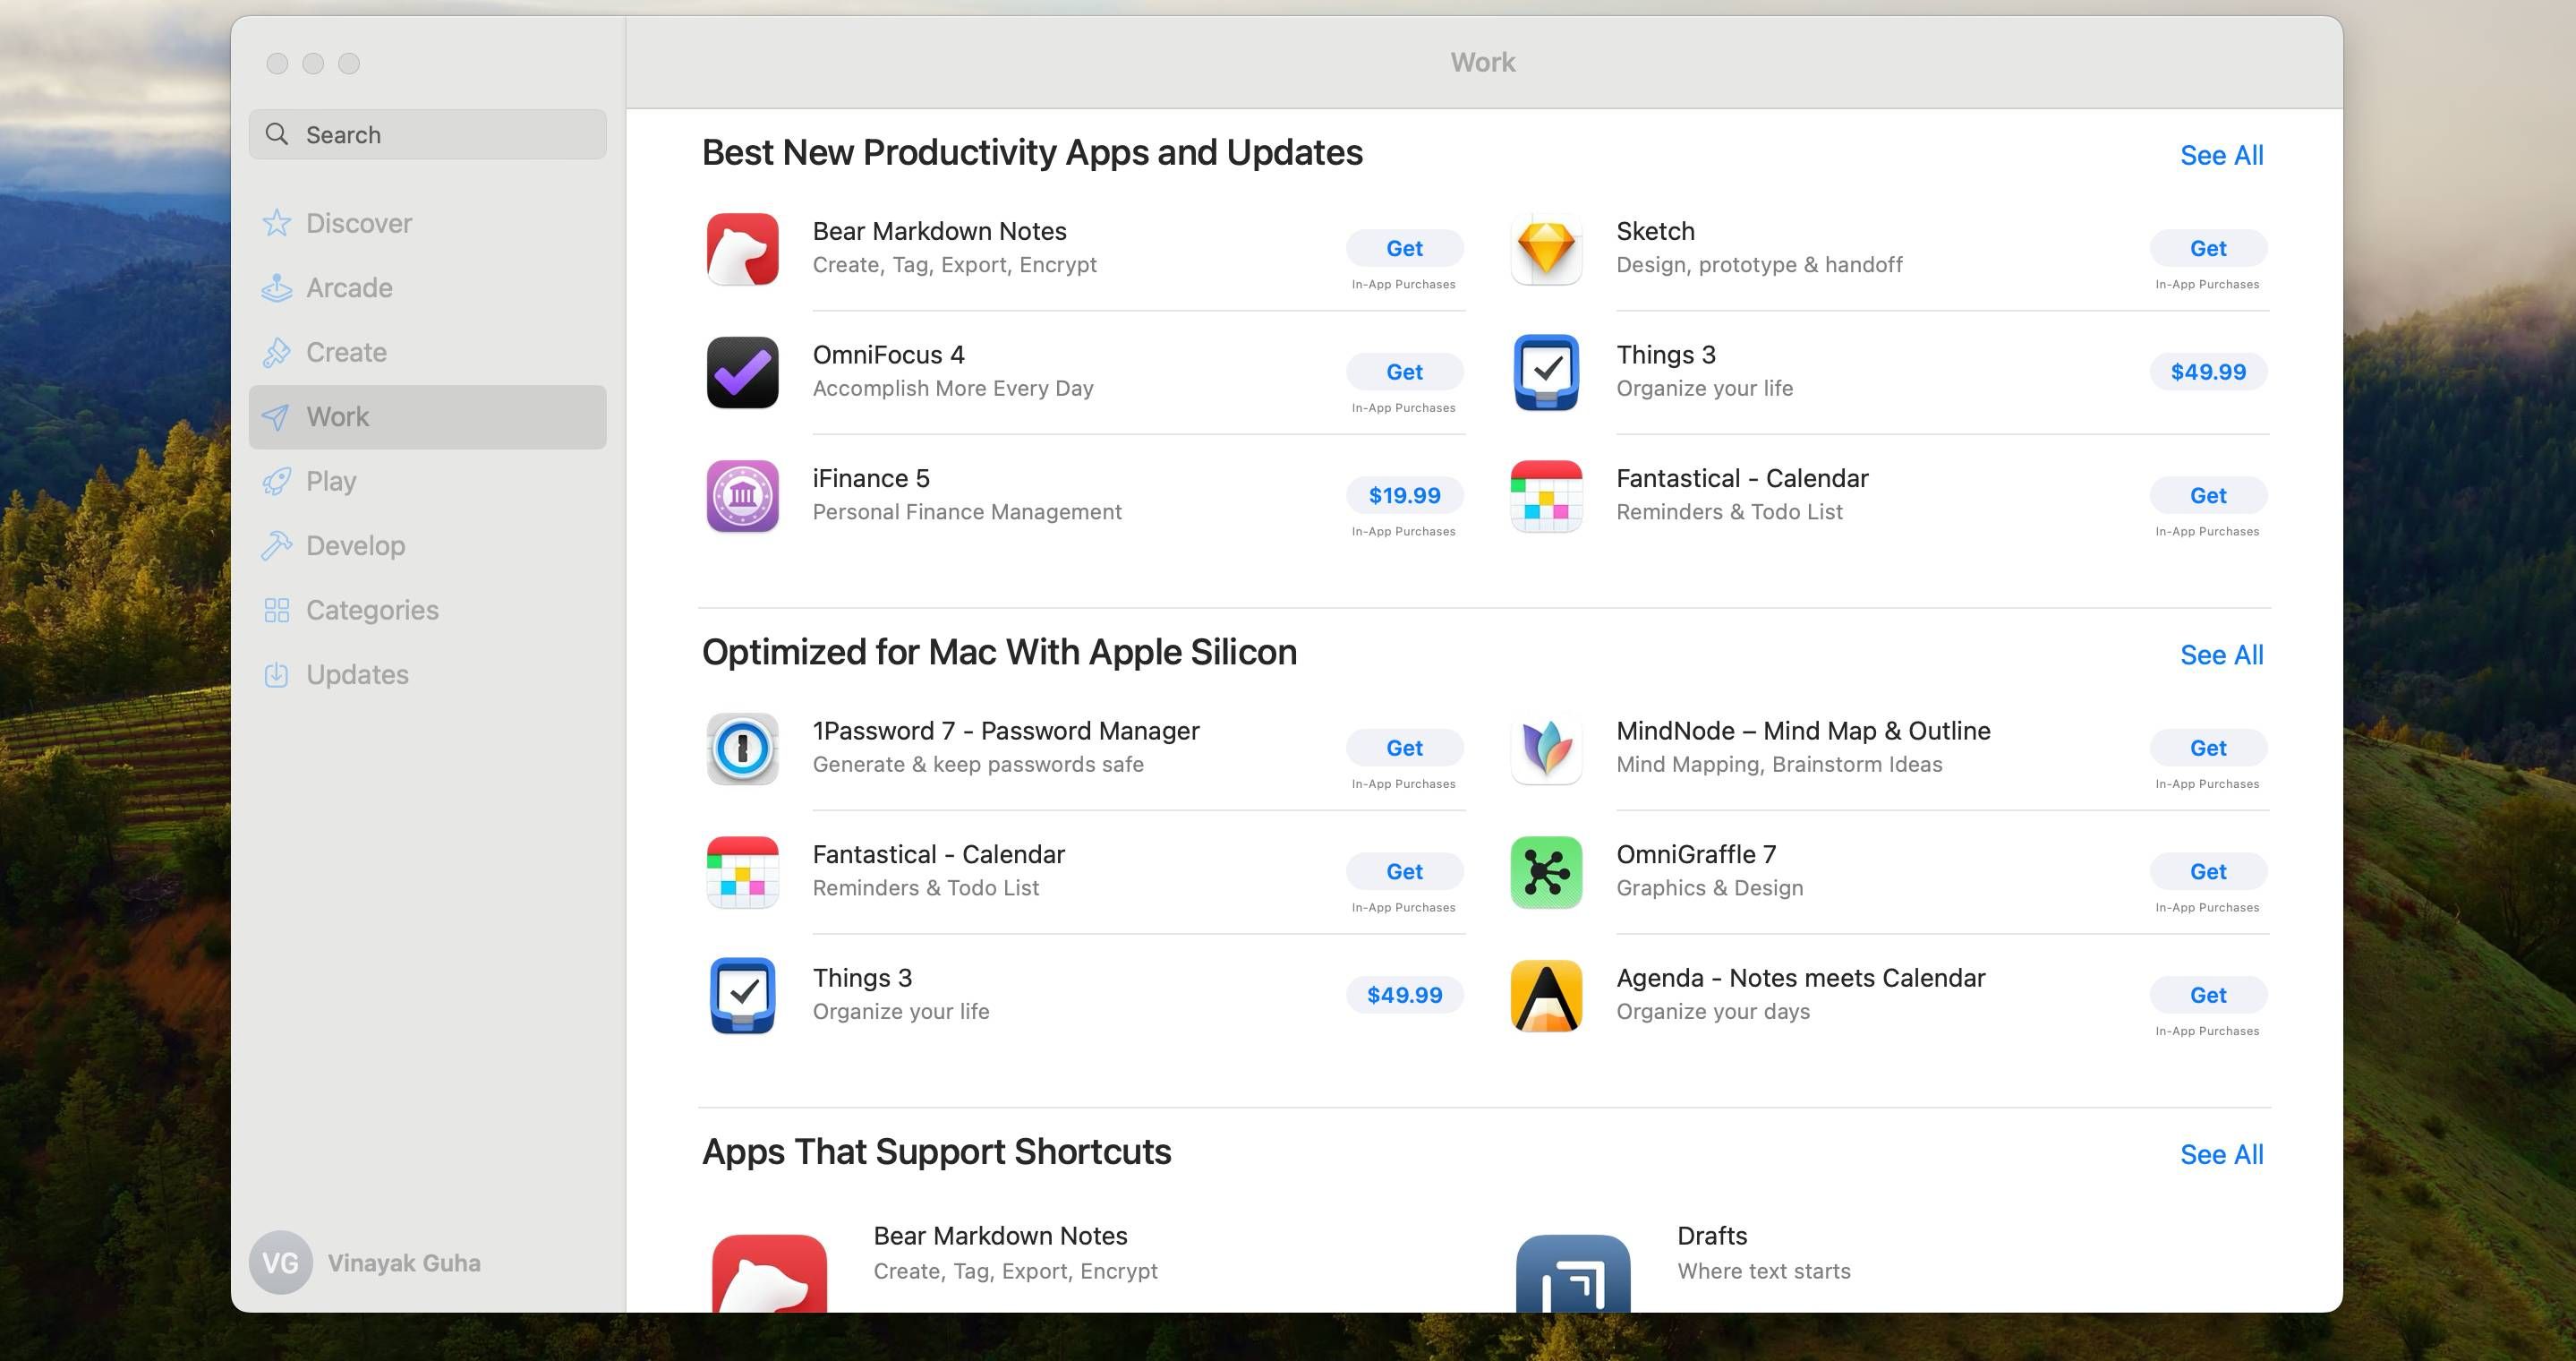
After you explore the pre-installed software and programs on your system, you may find that you’re missing essential Mac apps that you need for everyday tasks. This is where Mac’s App Store comes in handy. The App Store is a one-stop shop where you can browse a range of applications (both free and paid) and download them.
If you don’t see the App Store icon in the Dock, navigate to the Apple menu > App Store.
Once you have the App Store open, browse the various categories to find what you need. Whether it’s productivity apps, games, or specialized software, you’re likely to find it in the App Store’s extensive library.
6. Connect Your Printer
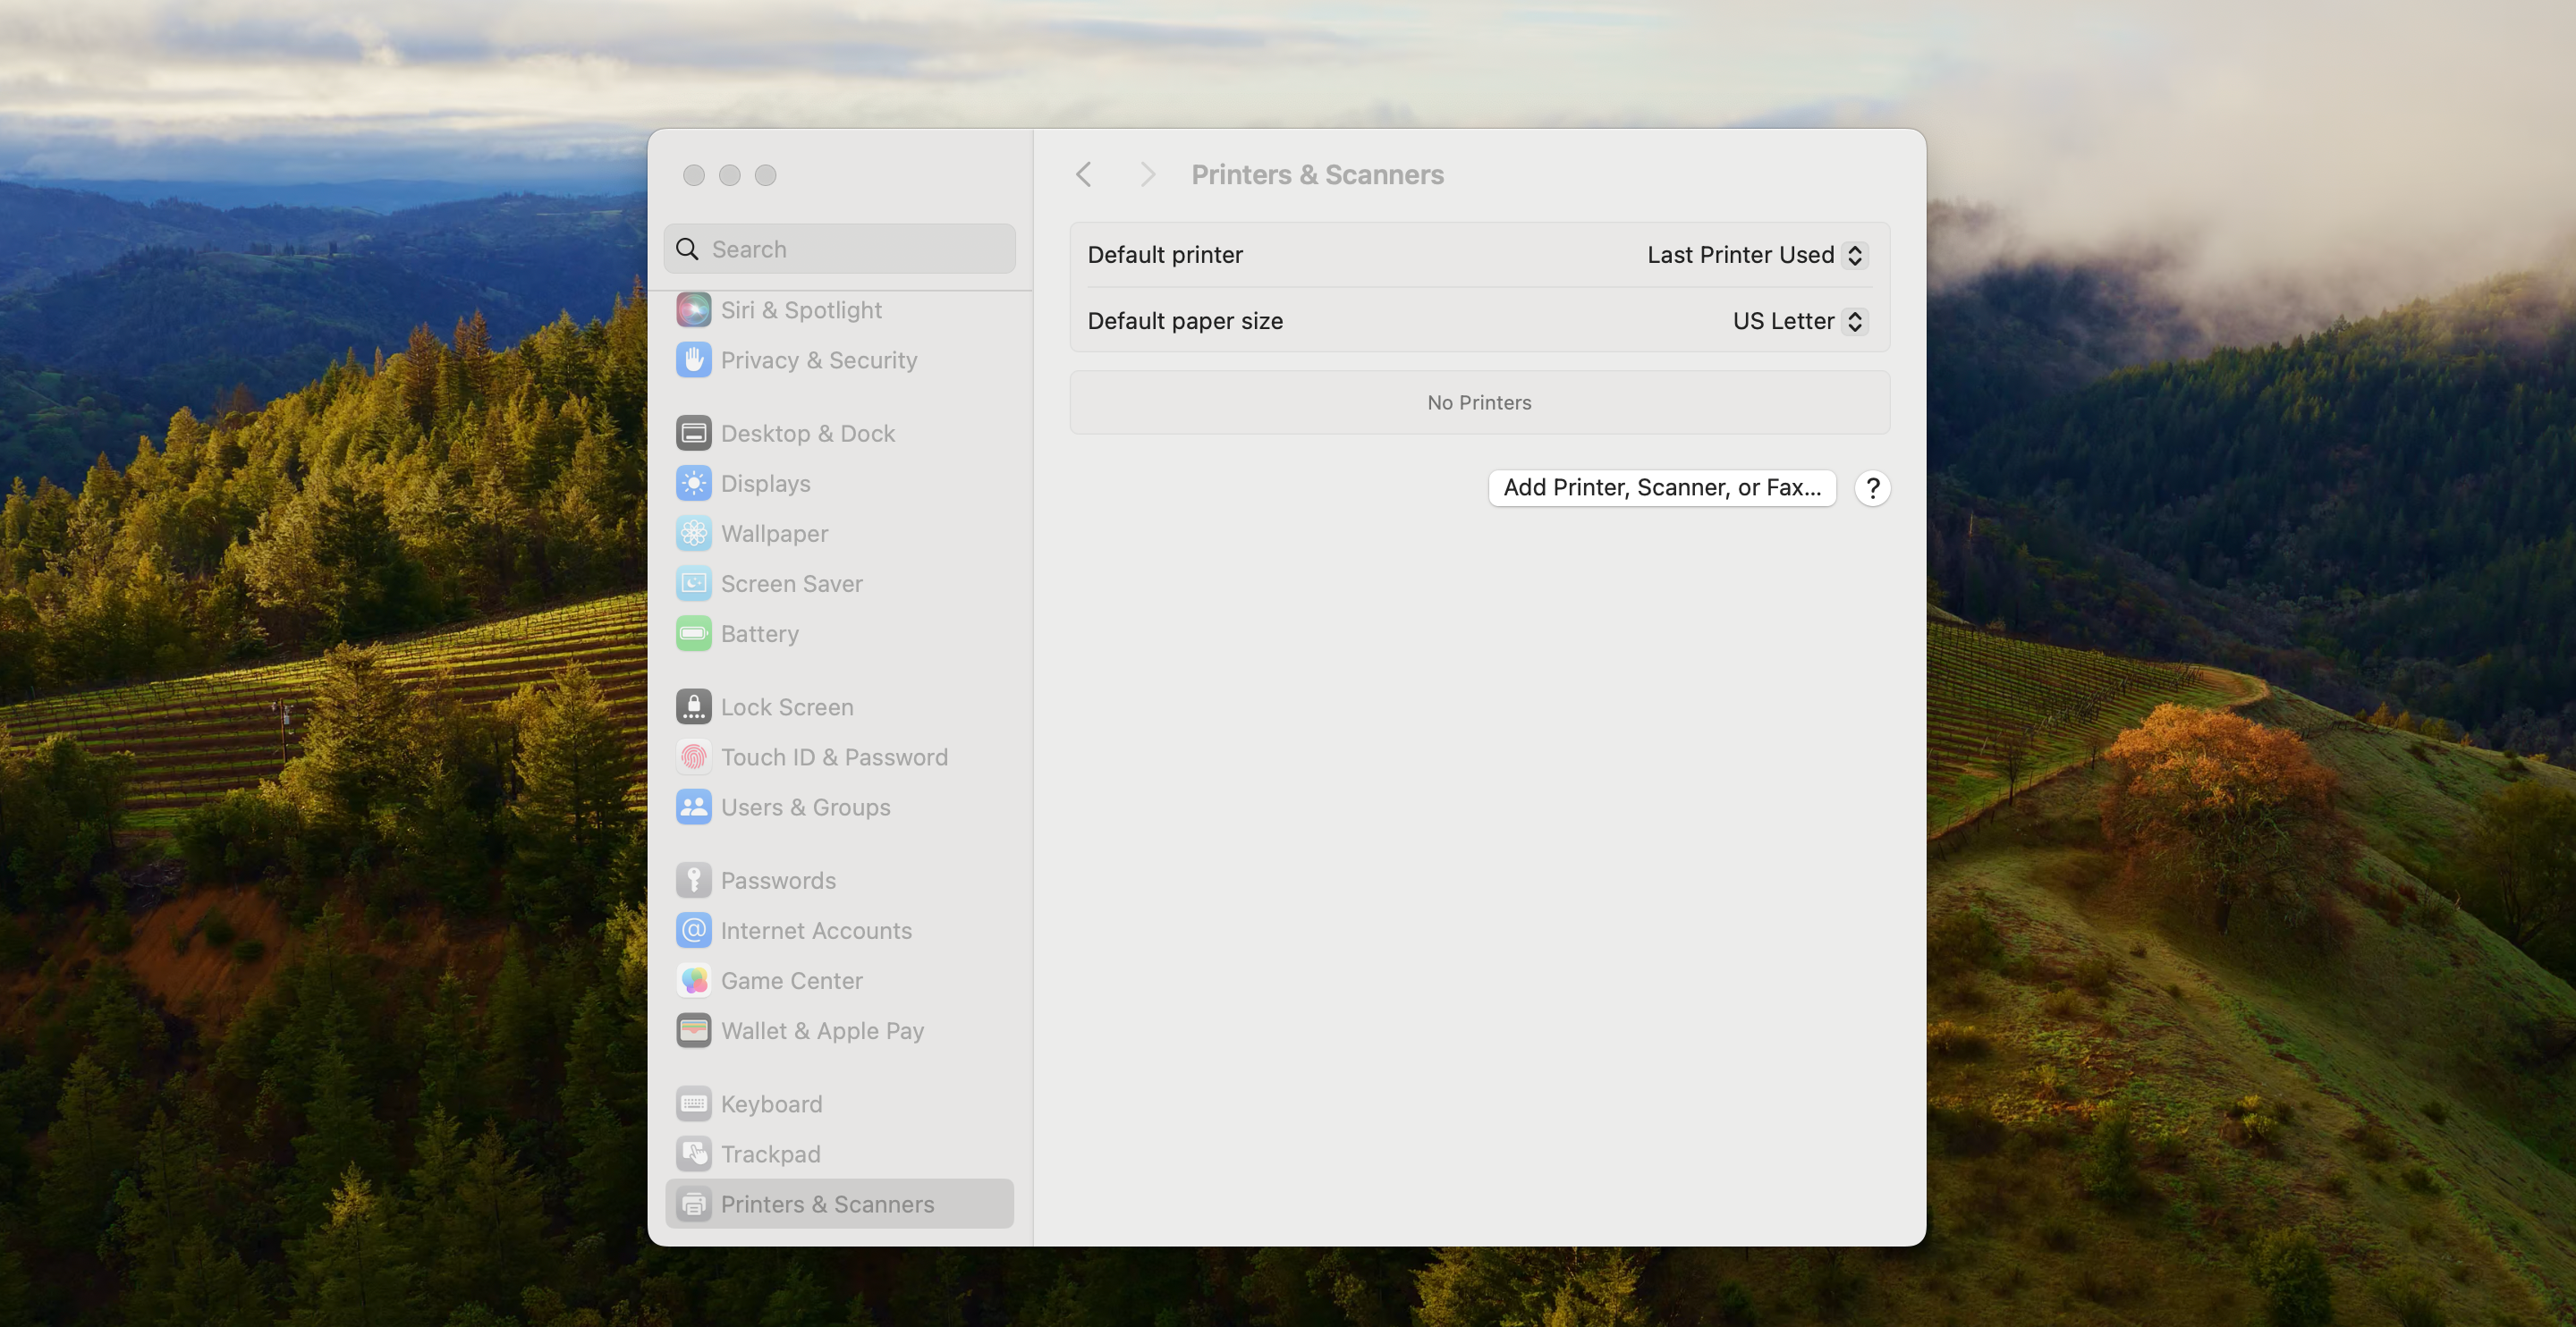
Connecting a printer to your computer is a fairly straightforward process. If you have a printer at home, all you need to do is connect your printer to your Mac using a USB-C port. If it’s a wireless device, make sure it’s connected to the same Wi-Fi network as your Mac.
Then, navigate to the Apple menu > System Settings > Printers & Scanners, and select “Add Printer, Scanner, or Fax” to find the connected printer.
7. Customize Your Desktop
If you don’t want your computer to look the same as every other Mac out there, try personalizing it.
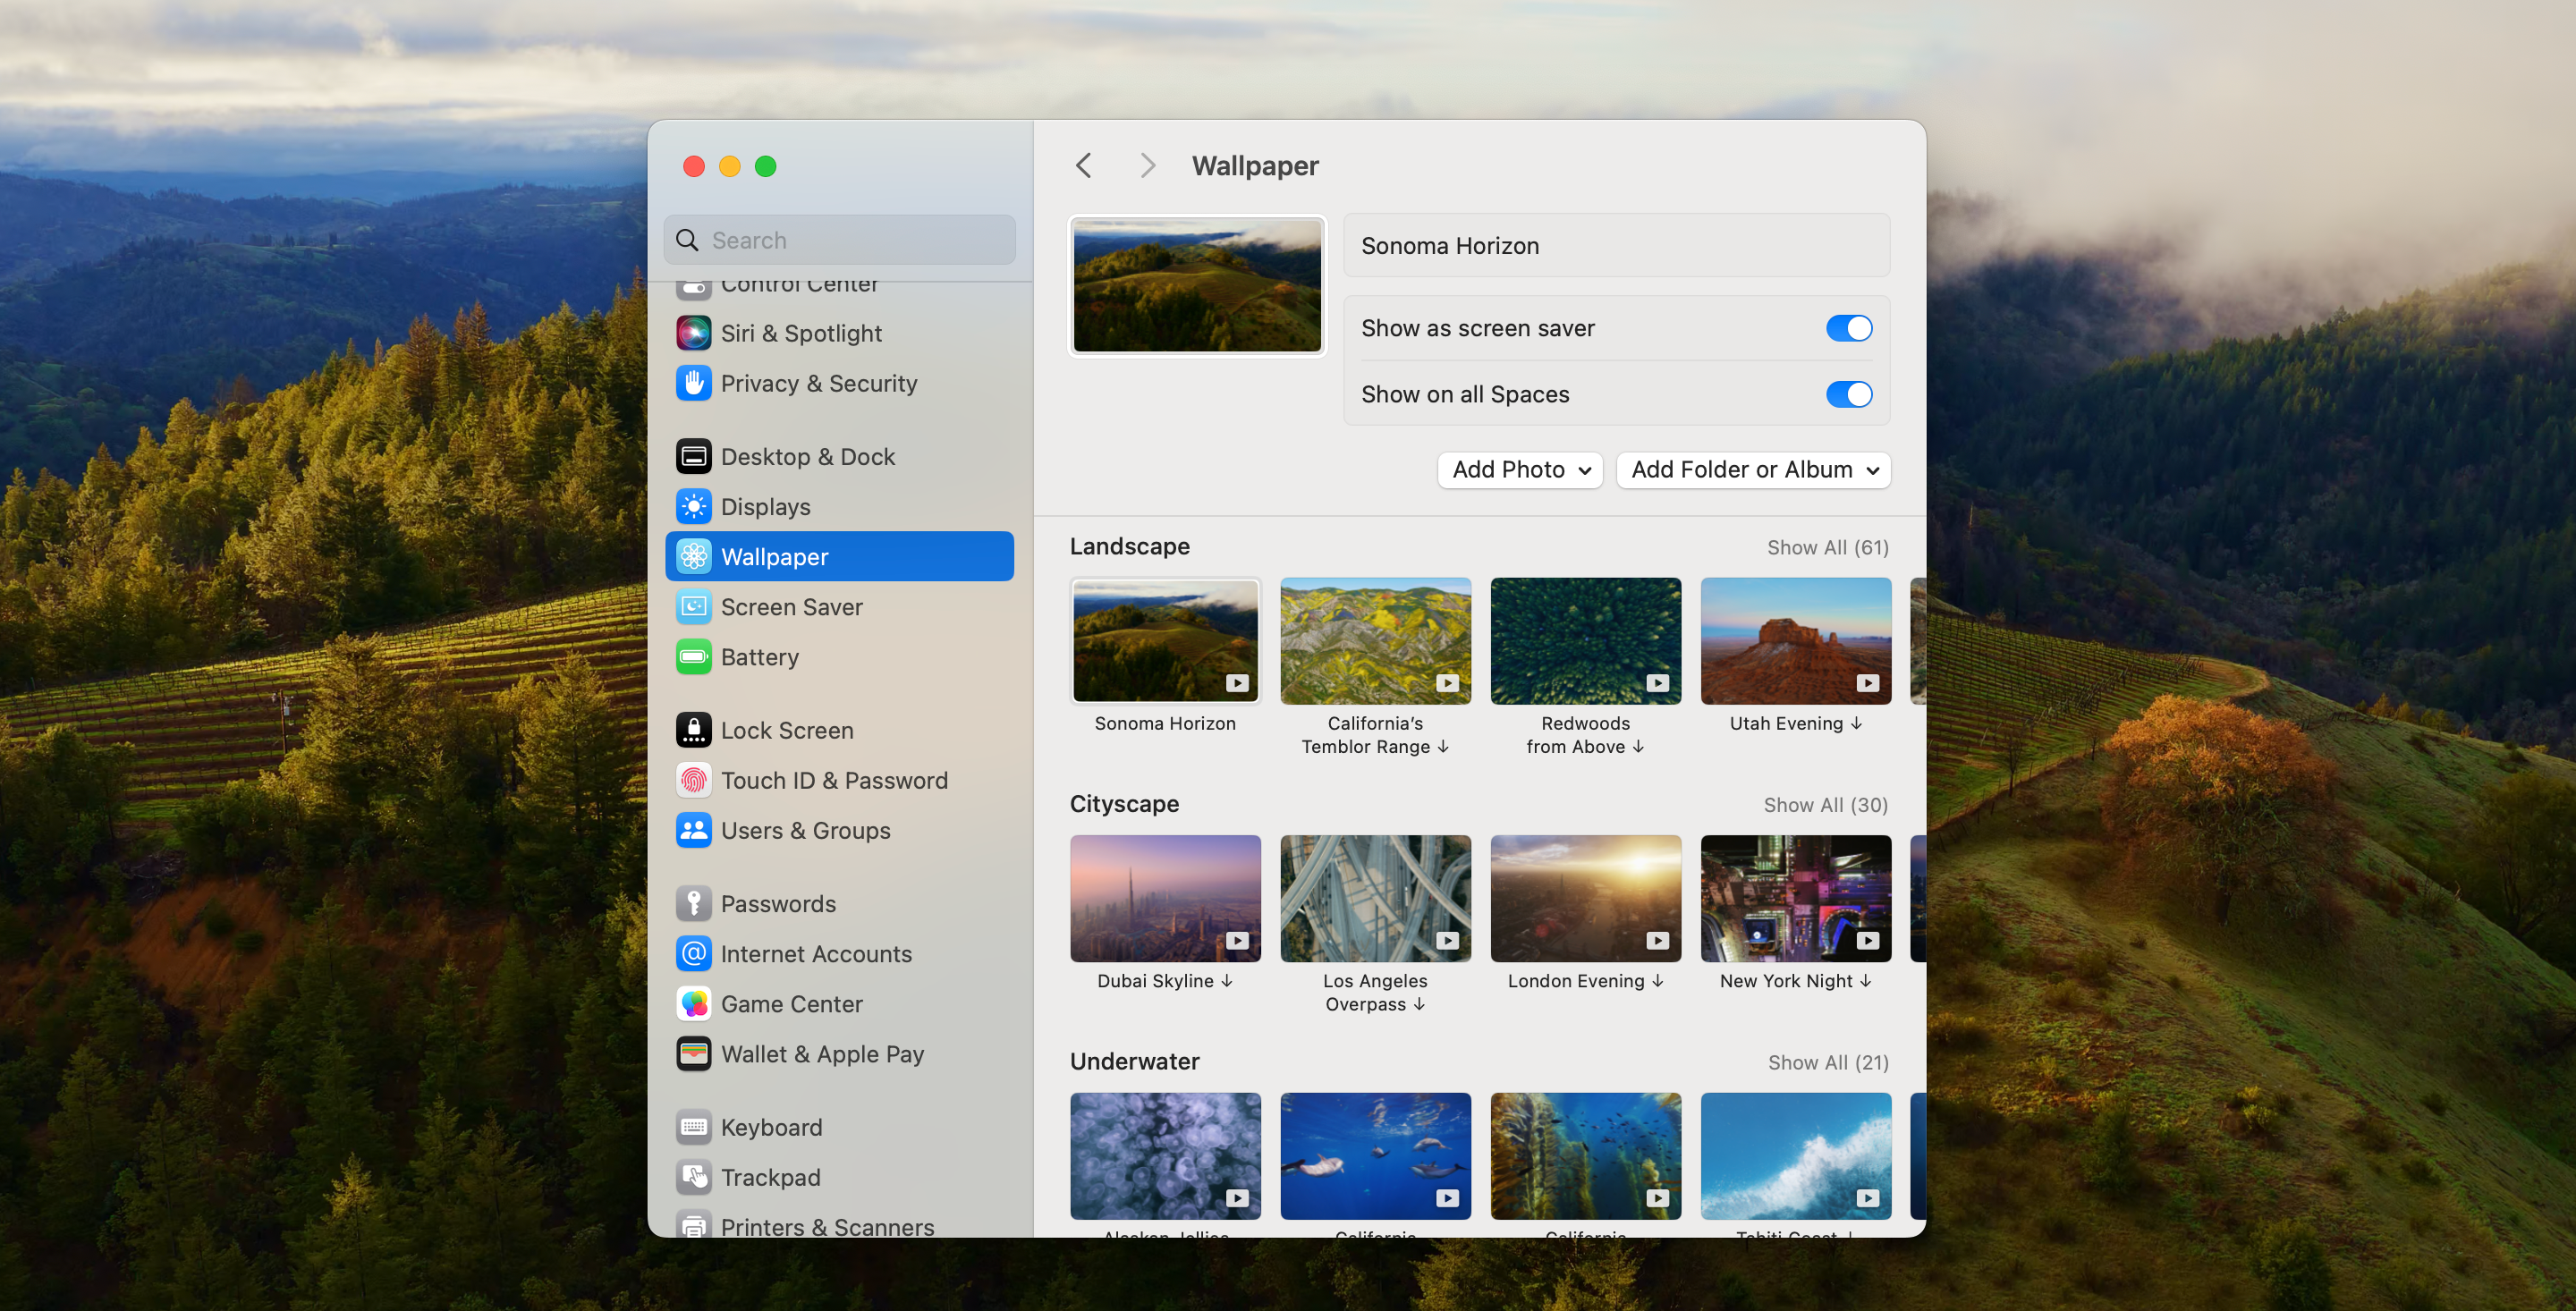
There’s a lot you can do to customize the appearance of your Mac. Go to Apple menu > System settings, and here you can change the wallpaper and screen saver, choose a different theme (“Appearance”, then select “Light”, “Dark”, or “Auto”), and customize the dock (“Desktop & Dock”).
While you’re at it, you could also consider customizing the Mac’s built-in browser, Safari. Although Safari is a great browser on its own, downloading the right Safari extensions can improve your user experience significantly.
8. Purchase Protective Gear
MacBooks are pretty sturdy. Still, if they fall or are subjected to impact, they can get damaged like any other gadget. A great way to safeguard your laptop is by purchasing protective gear.
To protect your Mac from scratches and dings, it’s best to purchase a hard-shell case or sleeve. The best part is that, since these protective cases come in a variety of designs and materials, you can choose one that suits your preferences and style.
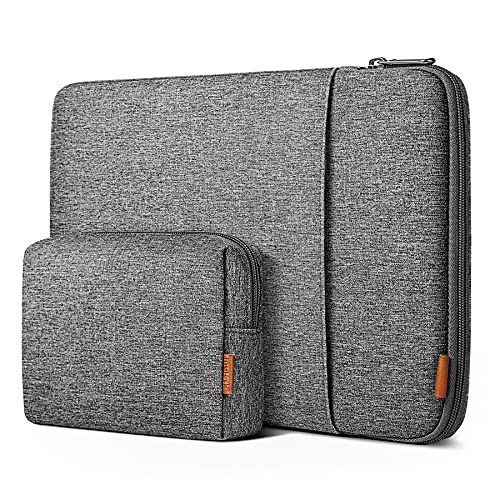
Inateck 12.3-13 Inch Laptop Case Sleeve 360° Protection Compatible with 13 inch MacBook Air M2/M1 2018-2022 A2337/A2179, MacBook Pro M2/M1 2016-2022, Surface Pro 9/8/7/6/X/5/4/3 with Accesory Bag
A MacBook sleeve is a great way to keep it safe in your travels, but worry-free during daily use.
You may also want to purchase a keyboard cover to protect against spills and dust. For the screen, consider purchasing a screen protector—this can also help reduce glare.
9. Set Up System Backups
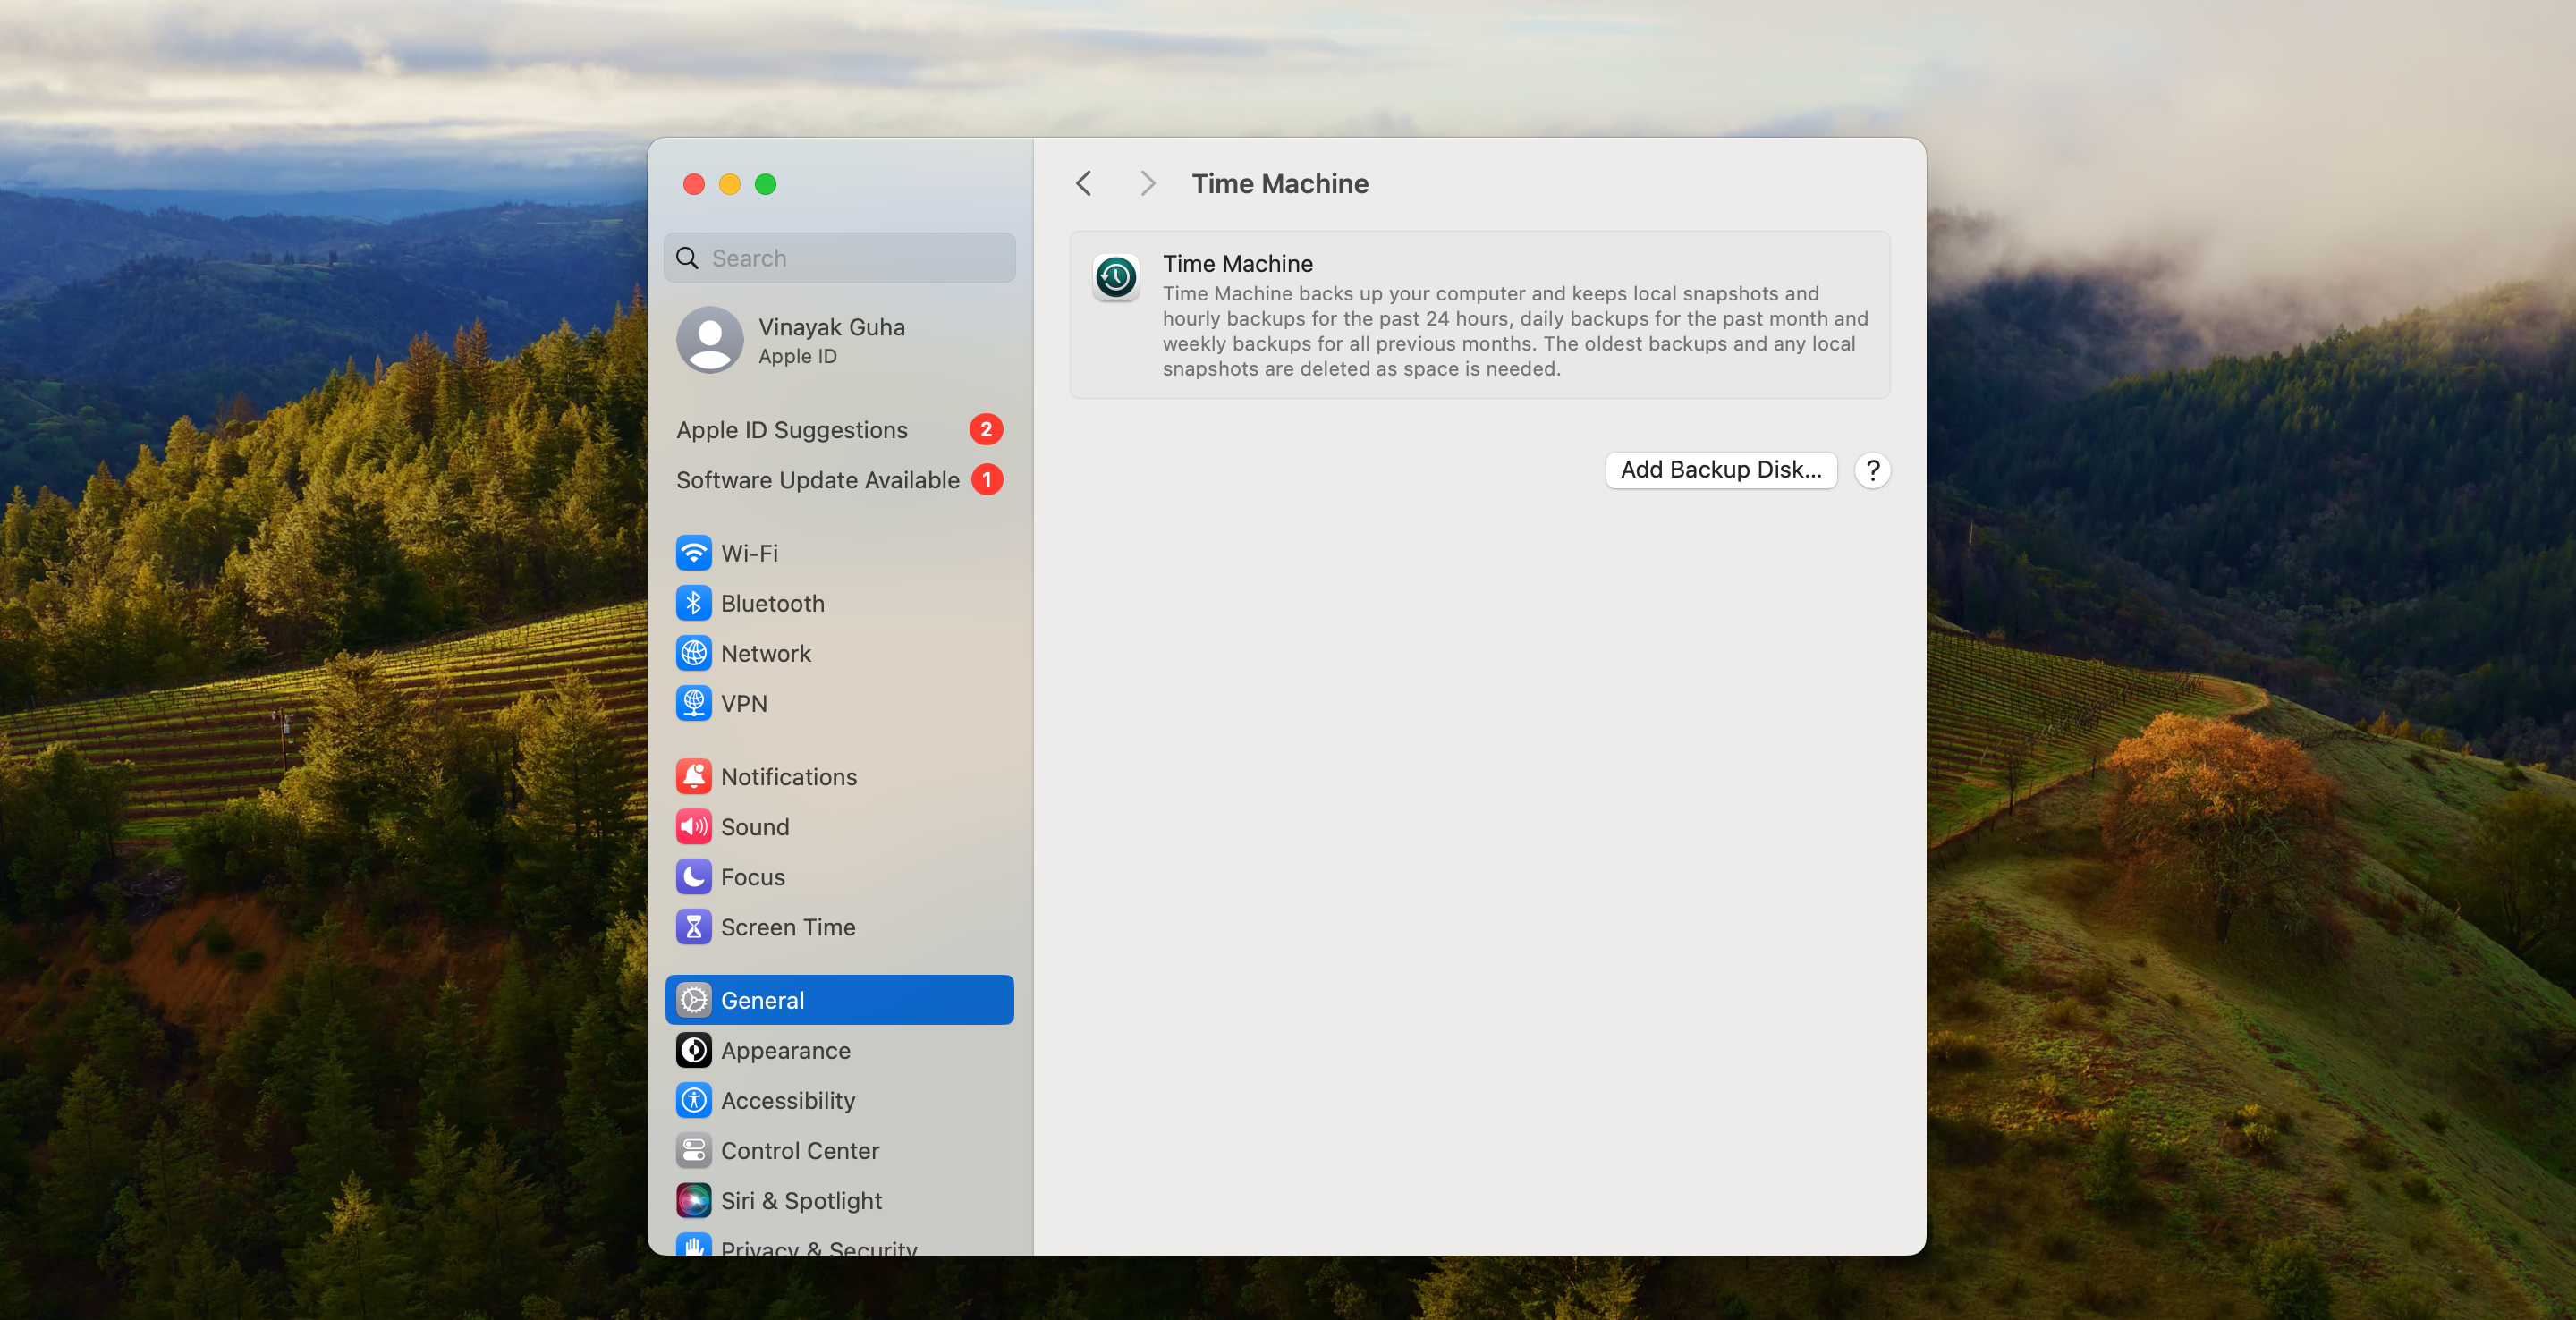
System backups, as long as they’re performed regularly, can help restore data if your Mac suffers a hardware or software accident. If you have an external storage device, Time Machine can back up your files, apps, photos, and documents.
To use Time Machine, you’ll need to first connect an external storage device to your Mac. Next, navigate to the Apple menu > System Settings > General > Time Machine. Then, click “Add Backup Disk” and select your connected storage device.
After this setup process is complete, your Mac will use this storage device to make backups.
10. Learn Keyboard Shortcuts
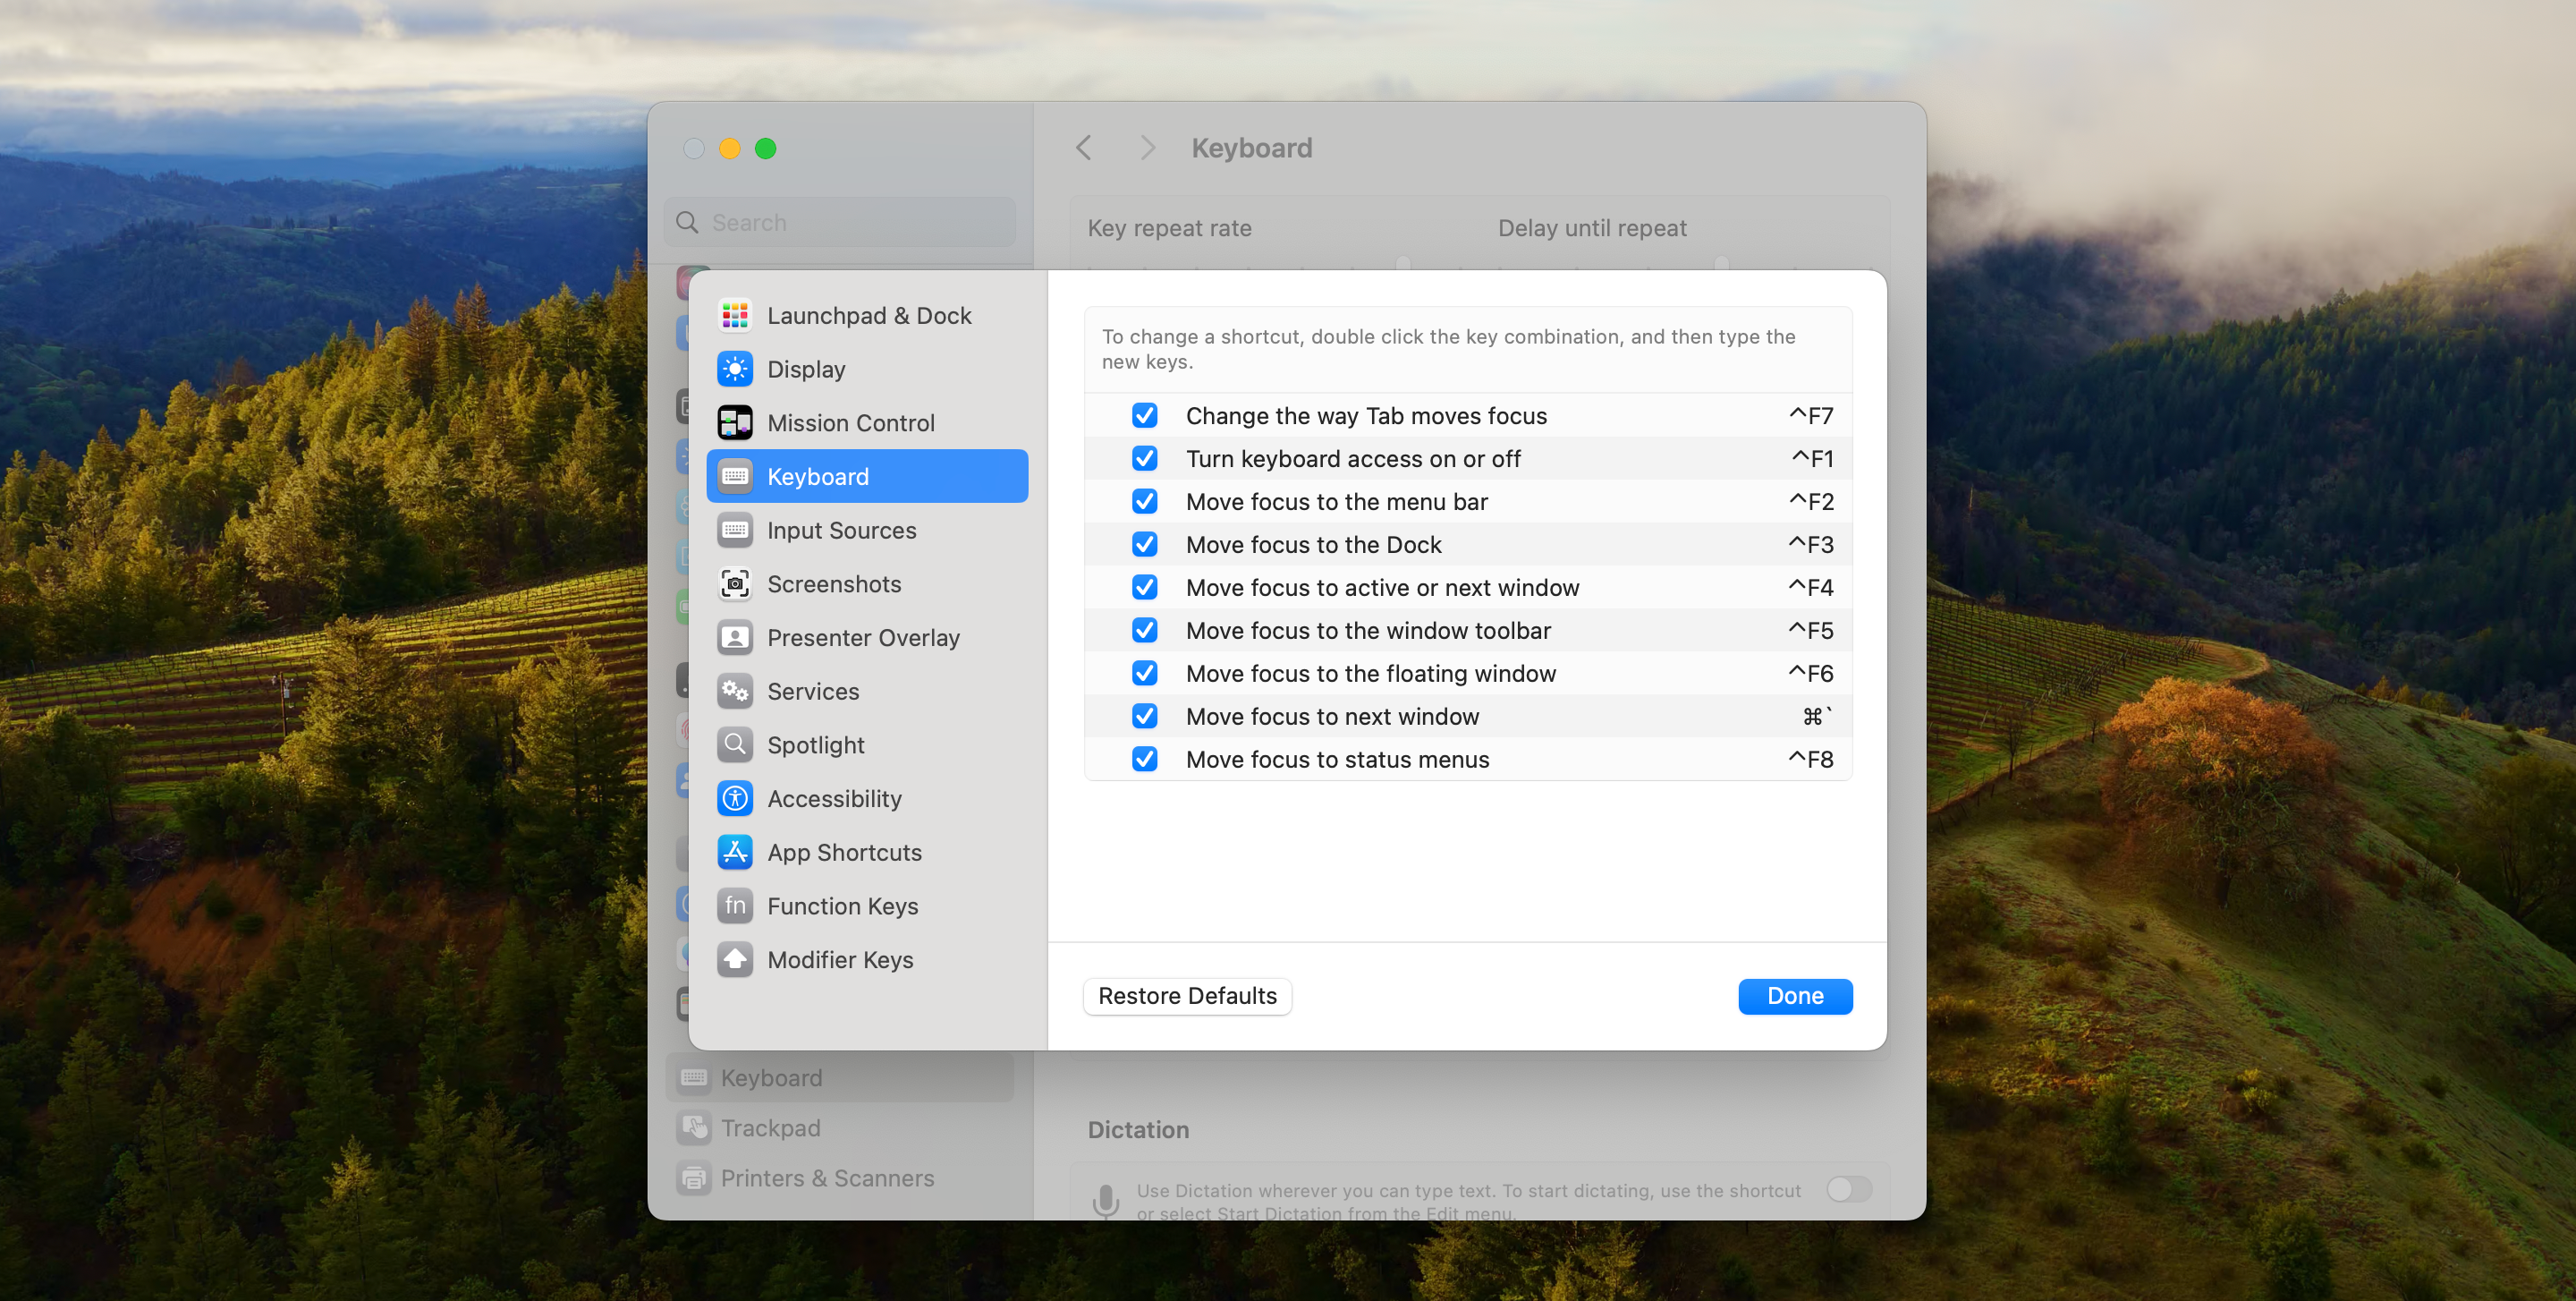
Getting familiar with Apple’s user interface is rather straightforward. That said, if you want to save yourself some time, Mac’s keyboard shortcuts are the way to go. Each app and action on your Mac has specific shortcuts to speed up your workflow.
The easiest way to familiarize yourself with keyboard shortcuts on your Mac is by navigating to the Apple menu > System Settings > Keyboard. Select “Keyboard Shortcuts” and review the shortcuts that appear in the pop-up box.
With this, you’re all set to begin using your new Mac. As you become more familiar with your computer, you’ll discover even more capabilities and tools that make it perfectly suited to your needs.
source
